A week ago, I shared my ideas about edible gifts with the folks at the Zero Waste Christmas Festival in Dublin.
As promised, here are all the recipes I mentioned for anyone who’d like to try gift some yummy surprises this Christmas.
If you are looking for sweet, savoury or boozy treats – here are some for you to try – most of them are simple and quick, some of them need a little bit more time and craft, some of them are even fully plant-based.
When gifting a food gift, remember that the packaging is a part of the gift – you can decorate your jars or boxes with festive ribbons, cut-outs, labels or go natural with pieces of holly, evergreen, cones. Forego the impersonal wrapping paper and customise your presents using materials you already have – that pieces of cloth or forgotten Christmas paraphernalia will come in handy!

Skip directly to recipes
Chocolate Pralines
Chocolate Bark
Cookie Mix
Christmas Biscuits
Raw Truffle Mix
Candied Peel
Crackers
Pestos
Marinated Cheese
Chutneys
Pineapple Vinegar
White Mulled Wine Mix
Eggnog
Mint Liqueur
Sweet
Chocolate Pralines
(inspired by Ina Garten)
Ingredients
300g good dark chocolate
100g good milk chocolate
250ml double cream
2 tbsp liqueur of your choice (I used grenadine syrup)
½-1 tsp vanilla extract
Method
Chop all the chocolate until fine.
Bring the cream in a small saucepan just to the boil, turn off the heat and let sit for 20 seconds.
Pour the cream through a fine mesh sieve into the chocolate. Whisk until all chocolate is melted.
Add vanilla extract and liqueur/syrup if using.
If you are pressed for time or just want the easy way, pour straight into silicone moulds and refrigerate. It will set in about 2-3 hours. Take out of moulds and pack. The less handling the better as the chocolate will thaw.
If you want to go for more of an artisan look, let the chocolate mixture cool in a room temperature for about an hour. Dollop 2 tablespoons of the mixture on a sheet and refrigerate them until firm (about half an hour). Take out of the fridge, roll them in your hands to form a ball and roll them in icing sugar, cocoa powder, dessicated coconut, chopped nuts or anything else you fancy.
These will keep refrigerated for weeks (allegedly, they never lasted me that long!) but serve at room temperature.
Chocolate Bark
If you are looking for something chocolatey with a nice wow-effect, you can try one of these chocolate barks.
In short, it comprises of choosing the ingredients you want in your bark (nuts, candy dried fruit, spices, etc.), spreading them onto a baking sheet and covering with melted chocolate coating or tempered chocolate…or indeed doing it the other way around – depending on your desire to show off the toppings or not!
It might involve a bit of a skill (tempering the chocolate as you might not find a chocolate covering without palm oil) but you can easily source the ingredients in bulk, so it’s worth to try.
Cookie Mix (Chocolate Chip and Walnut Brownies)
The internet is full of recipes for jarred cookie mixes and rightly so, it’s a fun present that is easy to make and looks good.
The idea is that you layer all dry ingredients in a nice jar and gift them with instructions – with wet ingredients to add and how to bake.
This is my one of my favourites:
Layer up in a jar:
1 1/2 cups (300g) granulated sugar
1 1/3 cups (160g) plain flour
1/2 teaspoon baking soda
1/4 teaspoon salt
3/4 cup (75g) cocoa, unsweetened
2 cups (300g) semisweet chocolate chips
1/2 cup (75g) coarsely chopped walnuts or pecans
Wet ingredients to be added:
2/3 cup (160g) melted butter, divided into halves
1/2 cup (125ml) boiling water
2 eggs, lightly beaten
1 teaspoon vanilla extract
Method
Heat the oven to 180 C. Grease and flour a 30x20cm baking pan.
In a large bowl, combine cocoa and baking soda. Blend in half of the melted butter. Add boiling water and stir until well blended. Stir in sugar, beaten eggs and remaining butter. Stir in flour and salt.
Stir nuts and the chocolate chips into batter. Spread batter in the prepared baking pan. Bake for 35 to 40 minutes or until the brownies are firm and begin to pull away from sides of pan.
Cool before cutting into squares. Voilá!
Christmas Biscuits
If you are a baker or do not shy away from mixing some flour, butter and eggs, you can always bake nice Christmassy biscuits, pop them into a jar or a box and I guarantee you they will be received with thanks.
Every year, I make these ‘gingerbreads’ – in inverted commas because they, in fact, have no ginger in them. They are actually honey cookies which are soft and taste like Christmas.
Honey Cookies (Medovníčky)
Ingredients
500g plain flour
190g honey
150g icing sugar
60g butter
2 eggs
1 tsp baking soda
3 crushed cloves
½ tsp ground cinnamon
Method
Mix all the ingredients into a (somewhat sticky) dough.
Divide into halves and place in a bowl, cover with a plate or wrap in a beeswax wrap (instead of cling film) and leave to rest overnight in a cold place.
Knead for a few minutes before rolling out.
Preheat the oven to 180C.
Roll out to about 5mm thickness and cut out shapes with cookie cutters.
Place on a baking sheet with baking paper or silicone mat.
Bake for 6-8 minutes – do not over bake – the edges shouldn’t be browned.
The cookies can be decorated with lemony sugar icing – whisk 1 egg white, 140g icing sugar, juice from one lemon until the sugar is dissolved and the icing is shiny and thick. Fill in a freezer bag or a paper cone with the icing, make a tiny hole in one corner and decorate.
However, if you don’t have time to do that just brush the cookies with a beaten egg white or whole egg before baking. You can also add a dollop of jam and a walnut half on top.

Some from last year…
Raw Truffle Mix
If you are looking for a cookie version for your vegan friends, here’s an idea.
The recipe is courtesy of Íde of Bring Your Own – you can buy all the ingredients in bulk in their stall or, if you’re pressed for time, even buy the mixture already jarred.
It’s super easy.
In a nice jar, layer up 50g of almonds, 50g of dates and 10g of coconut flakes. (Feel free to double it up for more truffles.)
Method: Tip out the coconut flakes in a blender and blitz them to shred them. Tip out on a plate and put aside. Put the rest of the ingredients in the blender and blend until a sticky consistency. Roll out small balls and finish them rolling in the shredded coconut. That’s it!
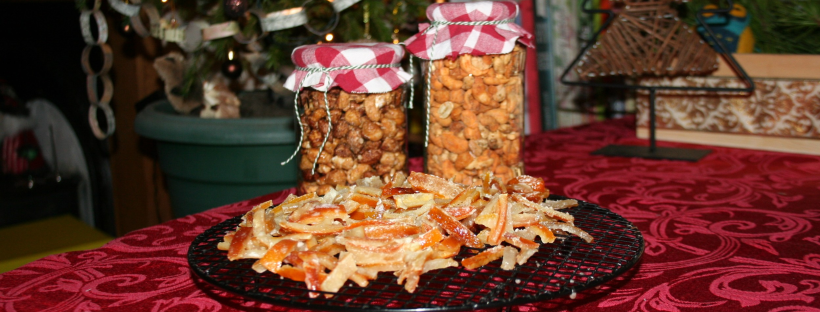
Candied Peel
I like this recipe because it’ using up orange or other citrus peel that would otherwise end up in the compost bin.
I takes a little bit of time to make but it’s mostly waiting time – plan accordingly.
I made it a couple of times and really like the recipe from Bright-eyed Baker which you can find here.
My only note would be don’t cover the pan so that the water can evaporate – I made this rookie mistake the first time I made it…
Savoury
Crackers
There are few things that go together better than crackers and cheese, or even better, crackers, chutney and cheese.
You can make up a hamper filled with this holy trinity of foodiness…here are a few recipes to help.
Sourdough crackers
If you heard about sourdough and were intrigued or even better, gave it a shot and realised it’s the best thing ever, I am happy for you. If not, maybe try some sourdough bread and you may just become interested enough to try it.
If you do have sourdough and feed it regularly, you know you end up with quite some of the ‘starter discard’ but don’t do what it says on the tin. Don’t discard it – rather turn it into delicious crackers.
This recipe is an adaptation of a recipe from Anne Marie Bonneau, the Zero Waste Chef, which you can find here.
Ingredients
1 1/2 cup unfed starter from the refrigerator
6 tbsp olive or sunflower oil
1 cup rye flour
1/2 cup spelt flour (plain or wholemeal)
1/2 tsp salt
1/2 tsp baking soda
3 tbsp linseed
Method
Combine starter and oil in a non-metallic bowl. Add flours, salt, baking soda and seeds. Combine. If necessary, knead the dough a few times to incorporate the last bit of flour. Cover bowl with a plate or towel and let rest for six hours at room temperature (I often skip this step and it’s fine – just rest it for about 15-20 minutes before making).
Store in the fridge after this if you won’t bake right away. The dough will keep in the refrigerator for about a week. Let it warm at room temperature for 15 minutes to half an hour to making rolling easier.
When you’re ready to bake, divide the dough into quarters on a generously floured surface.
Preheat oven to 190C.
Roll the dough out about two millimeters thick.
Transfer the dough to ungreased baking tray.
Cut into rectangles with a pizza cutter or a knife. I do this on the working surface rather than on the baking tray – but that’s me 🙂
Bake for 6 to 8 minutes, turn crackers and bake 6 to 8 minutes longer. Crackers are done when crispy and slightly browned. Know your oven and baking trays – some may bake quicker and some longer (glass baking trays are usually slower to bake on as I learned).
Transfer crackers to a rack to cool. Store in a glass jar. These also freeze well if you don’t munch on them all at once.

Easy crackers
If sourdough isn’t your thing, fear not, these easy crackers from The Kitchn are as good.
Ingredients
3 cups (360g) plain flour, or a mix of plain and whole grain flours
2 tsp sugar
2 tsp salt
4 tbsp extra-virgin olive oil
1 cup (250ml) water
Optional topping: 1 tbsp sesame seeds, 1 tbsp fennel seeds, 1 tbsp poppy seeds, 1 tsp sea salt
Method
Heat the oven to 230°C and place a rack in the lower third of the oven. Sprinkle a baking sheet lightly with flour and set aside.
Mix together the dry ingredients. Add the oil and water. Stir until a soft, sticky dough is formed. If a lot of loose flour remains in the bottom of the bowl and the surface of the dough, add more water a tablespoon at a time until all the flour is incorporated. Let it rest for 5-10 minutes.
Divide the dough into halves and shape the dough into a square. Working from the center of the dough out, roll the dough into a rectangle roughly 2mm thick or thinner. If the dough starts to shrink back as you roll it, let it rest, uncovered, for 5 minutes and then continue rolling.
Sprinkle dough with topping (optional): Brush the surface of the dough very lightly with water. Combine the seeds in a small bowl and sprinkle half of them evenly over the surface of the dough.
Cut the dough into cracker-sized rectangles using a sharp knife. If you are after more fancy shapes, use cookie cutters.
Transfer crackers to baking sheet and prick with fork to prevent them from puffing during baking. It’s fine to crowd the crackers very close to each other.
Bake the crackers in the oven for 12-15 minutes, until the edges are browned. Thinner crackers will bake more quickly than thicker ones; you can remove the crackers as they brown to your liking and continue baking the rest. While the first batch of crackers is baking, roll out and cut the remaining dough.
Transfer the baked crackers to a wire rack to cool completely. The crackers will crisp further as they cool. Store the crackers in an airtight container on the counter for 3-5 days. If you’re crackers are a little old and less-than-crispy, lay them on a baking sheet and put them in a 180C oven for a few minutes to re-crisp.
Pestos
If you are heading to a Christmas party and want to bring some crowdpleasers to the savoury table, you can make some pesto – it’s quick, easy and you can even use up things otherwise destined for compost.
Also, you don’t need to feel limited by the classic components – mix up your nuts, greens or use nutritional yeast instead of cheese if you want your pesto be fully plant-based.
I will borrow a carrot pesto recipe from Lindsay Miles of Treading My Own Path which you can find with 3 other great pesto recipes here.
Carrot Top Pesto
Ingredients
2 large handfuls of carrot tops
1 large handful of basil
1/3 cup (50g) cashew nuts (or other)
9 brazil nuts (50g) (or other)
2 tbsp olive oil
1 large garlic clove
1/2 avocado (or 3 tbsp of olive oil)
1/3 cup (30g) nutritional yeast or grated cheese (or to taste)
Method
Blend the nuts in a food processor until they resemble coarse breadcrumbs and set aside.
Chop or crush the garlic, then add the basil leaves and carrot tops in the blender and blend until fine. Add oil and avocado and blend again. Add nuts and cheese/yeast if using and pulse to combine. Add more oil to taste if required. Store in a glass jar in the fridge, and use within 5 days. Can be frozen.
Marinated cheese
If you are putting together a foodie hamper, you can include a jar of marinated cheese. It’s easy, quick and looks and tastes good.
Ingredients
Brie or other soft cheese
Shallots/onion
Red capciscum pepper
Dried porcini mushrooms (a small handful)
Peppercorns
Bay leafs
Garlic cloves
Salt
Parika
Chilli flakes
Sunflower oil
Method
Cut the cheese into 5mm slices and sprinkle with salt. Layer up in a jar with thinly sliced shallots, pepper and halved garlic cloves. Soak the mushrooms in a bit of boiling water for few minutes, then squeeze out the water and add to the jar. Add a couple of peppercorns, a bay leaf and some chilli flakes. Work your way up to fill the jar. Once full, pour over sunflower oil to cover everything. Leave in the fridge for 5 days for flavours to combine. The cheese can be served with crusty bread or crackers. Leftover oil can be used in cooking – salads or aforementioned pestos are a good choice!
Chutneys
The third part of the cheese-cracker-chutney combination may require a bit of effort and time but it’s definitely worth it. Preserved in sterilised jars will keep for a year (and maybe even a tad longer).
I took inspiration from this classic apple chutney recipe.
Classic Apple Chutney
Ingredients
1½ kg cooking apples, peeled and diced
450g granulated sugar
100g molasses
500g raisins
2 medium onions, finely chopped
2 tsp mustard seeds
2 tsp ground ginger
1 tsp salt
700ml cider vinegar (I used a mixture of homemade apple scrap or pineapple vinegar)
Method
Combine all the ingredients in a large, heavy saucepan. Bring the mixture to a boil over a medium heat, then simmer uncovered, stirring frequently, for about an hour, or until thick and pulpy. Remove from the heat, leave to cool and transfer to sterilised, clean, dry jars and seal.

Chutneys ready to impress…
Raw Pineapple Vinegar
If the recipient of your edible gift is a fan of healthy homemade concoctions, you can surprise them with a raw apple cider or pineapple vinegar.
The latter I came across when a pineapple I bought started to go sour but I refused to throw it out – I looked up a recipe for a fruity vinegar and the result pleasantly surprised me. I used this recipe from the Fermented Food Lab.
Ingredients
½ pineapple
4 cups (1l) water
1 cup (180g) brown sugar (I used a mix of granulated sugar and molasses)
2 whole cloves
Method
Cut up the pineapple into big chunks and leave the skins on.
Mix the the sugar in 4 cups of water until sugar dissolves.
Add the pineapple and the sugar water to a glass jar.
Add in the cloves.
Cover with a cloth and secure with a rubber band.
Store in a cool, dark place (away from direct sunlight) for 3-4 weeks.
Stir the pineapple every few days to aerate it and prevent mold from growing on the surface.
If mold forms on the surface, scoop it out. Don’t worry, the vinegar is still good.
Taste the vinegar after 3 weeks. If it tastes sour and acidic like vinegar, strain out the pineapple chunks and bottle it. If not, let it ferment for another week. Repeat until it tastes like vinegar.
Store in a glass container or bottle in your pantry for several months to a year.
Use in salads or in a chutney 🙂
If you like apples and use a lot of them for cooking, you may be left with some cores and peels that seem to be no good for anything else but that’s a mistake – with the same method as above (fermentation of sugar water by fruit), you can easily make apple cider vinegar. Find the full recipe here.
Boozy
If there is one part of festive food that I look forward to during the year it’s the boozy concoctions. Casually sipped with friends while catching up, sweet enough to be a dessert but somewhat too sweet to drink too much which avoids the next day hangover. Perfect.
The following recipes are also easy to make, don’t need heap of ingredients and are quite easy to buy in bulk.
White Mulled Wine Mix
Do you think that all mulled wine has to be red? Au contraire. White mulled wine is just as (if not more) delicious.
Put together a bottle of wine, an orange and jarred spices and you have a gift that won’t go unappreciated.
Spice Mix
55g white or brown sugar
5 cloves
3 cardamom pods
1 star anise
A piece of cassia bark or a small piece of cinnamon
Layer up in a small jar. Print out the following instructions and attach to the jar.
Add: 750ml white wine, 250ml water (optional), 3 slices of orange/lemon. Bring almost to boil. Strain, reserve spices and serve. Add 55g of sugar and repeat.
Eggnog (Vaječný koňak)
This recipe was definitely the favourite sample at my workshop. There are many methods and recipes for this Baileys’ type of liqueur – the following one is quick, easy and delicious. (It does contain raw eggs so if you prefer, look for recipes that cook the egg yolks in a bain marie first.)
Ingredients
3 egg yolks
1 tbsp sugar
1 tsp vanilla extract
1 tin condensed milk
300ml dark rum (the Aldi one works nicely)
Method
Whisk egg yolks, sugar and vanilla extract until foamy. Add condensed milk and whisk for further 3 minutes. Stir in rum and taste, add more rum if you’d like. Pour into a clean bottle, store in the fridge and use up in a week.
Mint Liqueur
If you prefer something longer lasting and also plant-based, you may try this simple mint liqueur.
Ingredients
350 ml vodka
300ml water
30 mint leaves
300g cane sugar
Zest from ½ lemon
Method
Shred the mint leaves with your hands and place in a dark container with the lemon zest. Cover with vodka and leave to macerate for 3 days. Then strain through a fine mesh sieve, a coffee filter or a muslin cloth. You should get a clean liquid.
Over a medium heat, dissolve the sugar in water. Add this syrup to the mint macerate, transfer into a clean bottle and leave to ripen for three weeks in a dark place.


")
")
")


