Yummy Gifts

I realise that my blog was quite neglected this year…well, these things happen.

But when I was presenting two foodie workshops at the recent Zero Waste Festival and was asked if the recipes will be on my blog I knew I’d have to do it!

So, it might be a bit later than I’d like (to keep up with the year-long spirit!) but here it is. This year, I focused on easy and quick homemade edible gifts that will bring joy to the foodies in your life.

If you want to have a look at my last year’s edible presents, they are here.

Here is a quick summary.

I love anything that fits into a jar (no surprise there). The nicer the jar, the better. But any suitably sized jar will work for pretty much all of these.  

Sweet treats

Golden Latte Mix

A super-quick recipe for this trendy treat with the bonus of being able to get all of the ingredients loose (from Noms if you are in Dublin, for example).

Mix in a small jar equal parts of:

  • Ground cinnamon
  • Ground ginger
  • Ground turmeric

This is very scalable recipe, all you need to remember (and possibly write on a tag you attach to the jar) is that you need one teaspoon of this mixture per drink. The maths – add 2tsp of each ingredient and you will get 6 portions out of it. To make the actual drink, mix the powder with one teaspoon of runny sweetener of your choice (maple, date or agave syrup or honey) and add 200ml of hot milk (plant-based, if you like – soy milk works best I hear!). Sip with a smile.

Energy Balls

I was recently experimenting with making almond milk. If you ever tried it, you know that you’re left with the nut pulp after you drain the milk out of it. You can always dry it and pulse it to make almond flour but I found a recipe for these delicious little bites which would also make a great edible present.

I got inspired here, but didn’t bother with the decoration – laziness level 10 🙂

  • 1 cup almond pulp
  • 1 cup soft dates
  • ½ cup desiccated coconut (or flakes shortly blitzed in a food processor)
  • 2 tsp cacao
  • 1 tsp coconut oil, melted
  • 1 segment or slice of orange
  • Pinch of salt 

Pulse the almond pulp and dates in a food processor to break them apart. Add all the other ingredients. Blend in food processor until thoroughly combined and sticky.  Make balls of desired size. Done! If you want to go fancy, you can roll the balls in either coconut flour, cacao powder or cinnamon. Store in the fridge in an airtight container for up to a week (but I bet they won’t last!)

These also make a great sweet snack at parties.

Chocolate Mandarins

Imagine a jaffa cake without the sponge. Yum.

Disclaimer: If you have a proven method of melting and dipping stuff in chocolate, use it. For some reason, this is always a bit of a touch&go thing for me. Sometimes, the chocolate doesn’t want to melt, sometimes it doesn’t want to set. It should work with a normal (plain) chocolate bar though. (I used chocolate chips that I got loose for melting but they were very stubborn :))

Either way, these are quick and look pretty.

You’ll need:

  • Mandarins/Clementines/Oranges
  • Chocolate for melting
  • Pinches of salt

I don’t give the quantities on purpose – it depends on how much chocolate you want to use and what consistency it melts to. Maybe start with a half of a bar (50g) and 2 mandarins.

Melt the chocolate. Dip segments of the fruit in it. Leave to cool and harden on a non-stick surface (I use a silicone sheet). You can sprinkle a little bit of salt on slightly cooled pieces. Pack into a nice decorated jar. Keep away from heat sources 🙂

Gingerbread Syrup

At the workshop, I mentioned a recipe for a gingerbread syrup – I came across a recipe and realised that I might use up some edible glitter I somehow still possess. But only might. Make up your own mind, if you want to here.

Vanilla Extract

Annemarie, the Zero Waste Chef, wrote a very informative piece on this topic with loads of pictures. Give it a read! Might be too late to do this one now as it needs to macerate for about 2 months before use but I feel a little label with ‘ready to use by’ can do the trick!

I also wrote about cookie mixes, pralines and candied peel in last year’s edible gifts post.

Savoury bites

In last  year’s post I also detailed recipes for crackers, carrot top pesto, marinated cheese and a classic apple chutney.

This year my favourite pesto is one with an unlikely main ingredient – parsley. I also found a great way to keep it vegan, if you wish – just swap the cheese for nutritional yeast.

Parsley Pesto

  • 1 cup shelled walnuts
  • 2 cups chopped parsley, about 1 bunch
  • 1/2 cup grated hard cheese (pecorino or parmesan but cheddar will also do), alternatively 1 tbsp nutritional yeast
  • 3 garlic cloves, roughly chopped
  • 1/2 teaspoon salt
  • 1/2 cup olive oil

Put the walnuts, parsley, cheese, garlic and salt in a food processor and pulse for a few seconds to combine. Scrape down the sides of the bowl, then pulse again. Drizzle in the olive oil while the machine is running just long enough to incorporate the oil, about 20-30 seconds. Add more oil if you want runnier consistency.

Black Olive Tapenade

While I was looking for some vegan party food, I came across a recipe for a black olive tapenade that can make a nice edible gift too. Easy to make too and ingredients available to get loose.

  • 130g black pitted olives
  • 100g walnuts
  • 130g mushrooms
  • 15ml olive oil
  • Juice from ½ lemon (3.5 tbsp)
  • A pinch of mixed herbs (thyme, oregano or basil will do too)
  • 2 garlic cloves
  • Salt & pepper

Fry thinly sliced mushrooms, garlic and mixed herbs in olive oil until soft. Once cooked, cool the mixture a little, place in a blender with the olives and walnuts and blend until smooth. Or rough – however you like it. Add lemon juice, salt and pepper to taste.

Spicy Nuts

There is an abundance of recipes on the world wide web for both savoury and sweet spicy nuts – a healthy snack that is just made for jars. In case you are running very very late, you can also buy these – straight into a jar of course!

Boozy gifts

Last year, I listed recipes for mulled wine mix (did you know you can mull white wine as well as red?) and eggnog which went down a treat. I was, however, asked by my vegan friends if there is something for them as well. So this year, I tried and tested an ‘eggnot’.

Vegan Eggnog (Eggnot)

25g pitted dates
25g cashew nuts
25g dried apricots
¼ tsp mixed spice
200ml brandy
1 vanilla pod, seeds only or 1 tsp vanilla extract
1l sweetened almond milk

Soak the dates, cashews, apricots and mixed spice in the brandy overnight.

The next day, tip the mixture into a blender and add the seeds from the vanilla pod and the almond milk. Blitz until smooth, then pour into eight tall glasses (use a sieve, if you like) with ice and grate some nutmeg on top.

It’s a bit less creamy than a regular eggnog but it’s pretty good – but I do recommend serving it cold….which makes it a better party food than an edible gift but you can still go ahead and gift it. If  you use homemade almond milk, however, it’s best to consume straightaway or the next day (give it a good shake beforehand).

And finally, this is my new favourite yummy gift that requires very little work, only a bit of patience and time. The original recipe comes from here.

Spiced Arancello

  • 5 large oranges (preferably organic)
  • 1 cinnamon stick
  • 2-3 cardamom pods
  • 1 vanilla pod (or 1 tsp vanilla extract)
  • 1l vodka
  • 600g caster sugar
  • a few extra oranges, cinnamon sticks, cardamom and vanilla pods, to bottle

Pare the zest from the oranges using a peeler, making sure that none of the bitter white pith is left on the peel. Put the zest, spices and vanilla pod in one large or several smaller clean jars, then pour in the vodka. Seal and leave for a week, shaking the jar each day.

After one week, you’re ready for the next stage. Boil a kettle of water. Put the sugar in a heatproof bowl, then pour over 500ml boiling water, stirring until the sugar dissolves. Add to the vodka mix, then leave for another week, shaking the jar regularly. Strain into decorative bottles, discarding the peel and spices, and store in a cool place. Before giving, drop some fresh spices and peel into each bottle to decorate. Will keep bottled for 6 months. Cheers!

Happy gifting!

Sourdough for Beginners (like me!)

When I first heard about sourdough about 2 years ago, I was intrigued but thought it would be too much trouble and would not fit my lifestyle. Feed a bacterial blob twice a day? You must be mad. But as time went on, the intrigue stayed and my lifestyle, or maybe just the view of what’s worth spending my time on, has changed.

When I saw that there would be a fermentation meet-up at the first Zero Waste Festival a year ago, I was ready. Ready to give proper, homemade bread a chance. After some wobbly beginnings and a few trials and errors, I found a way to keep the sourdough alive and myself sane.

Rest assured it was a bumpy ride – despite my efforts to consult Google in the hope of giving me an easy ‘how to’. I found several methods but none of them really fit my schedule. Then I came across Zero Waste Chef blogspot ‘How to Prevent Your Sourdough Starter from Taking over Your Life’ and that was it. Anne Marie is quite the chef and she uses sourdough regularly. Therefore she doesn’t store her starter in the fridge as I do. She also made up her starter from scratch. That might have been a step too far so I went with the safe method of getting it off someone who knew what they were doing. I believe that the starter was 20 years old when I bought it so now she’s a full-grown adult of 21 years. I called her Marjorie, just for fun.

It might have taken a while to get to where I am now which is because it needs a few shots to find out how your flour, water, bacteria and oven behave. It also depends on the time of the year – every fermentation is quicker in warmer weather – your sourdough starter might be ready after 6 hours when it’s hot outside rather than 8-10 hours when it’s not.  Nevertheless, a year on, I am now happy with my sourdough bread and the occasional sourdough cake or pastry.

So, if you are a Monday to Friday working person and like the idea of having freshly baked bread at the weekend but don’t have time to attend to (and bake from) your sourdough starter every day, here is my regimen.

I keep my sourdough starter in my fridge in a flip-top jar. I usually keep about 90-100g of it at a time. Let’s this be Jar #1.

If I want to bake on Saturday during the day:

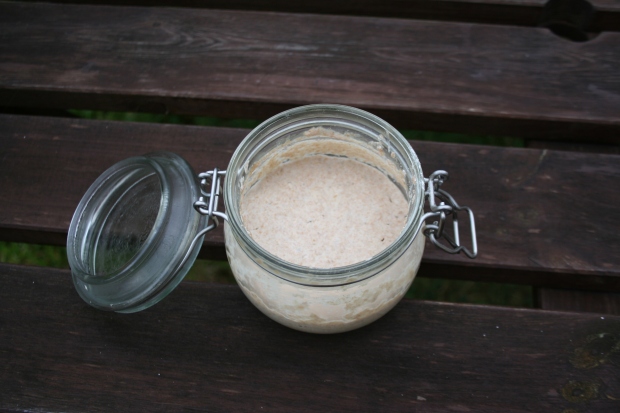
Sourdough starter taken out of the fridge

Sourdough starter taken out of the fridge

Thursday night (8-10pm): Take your sourdough starter (Jar #1) out of the fridge. Leave two tablespoons of the sourdough in the jar you store it in and transfer the rest into Jar #2 (or a suitable non-metallic container). Feed the Jar #1 with 40g of fresh flour (I use spelt wholemeal) and 40g of de-chlorinated water. I always keep a jug of normal tap water on my counter – the chlorine naturally dissipates after a couple of hours. Mix well together so that there is no loose flour and put aside on a counter-top. Put Jar #2 back in the fridge.

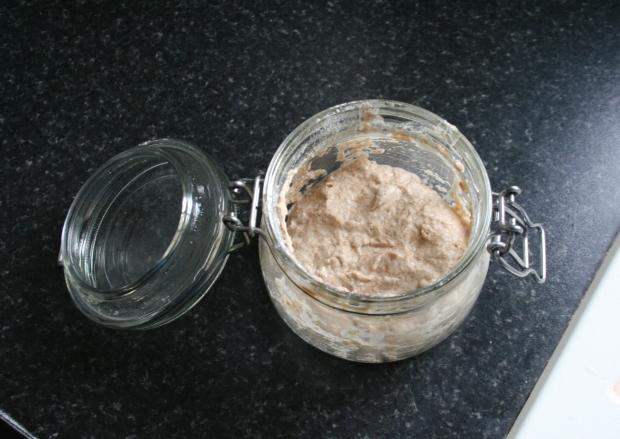
Freshly fed starter

Freshly fed starter

Friday morning (8-10am): The mixture should at least double in size and show nice bubbles throughout. Repeat feeding the starter (Jar #1). Leave two tablespoons in the jar, add fresh flour and water, transfer the rest into your Jar #2 from the fridge. You can make so many delicious things from this ‘discard’ – I make Anne Marie’s crackers that I adjusted a little for our taste.

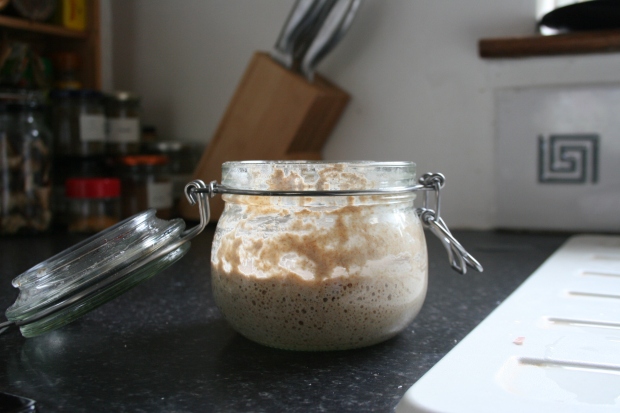
Fed starter after 8 hours

Fed starter after 8 hours

Friday night (8-10pm): Decide what you are going to bake the next day and how much leaven you will need. Prepare the leaven according to the instructions and set aside to be ready to bake in the morning. The leaven is basically just a lot of sourdough starter. Following the chosen recipe, combine starter from Jar #1 with fresh flour and water. You can now prepare your starter for the next week (Jar #1)– following the feeding method above. Put it in the fridge until next Thursday evening. If you forget to do this now, you can always do it tomorrow from the leaven. You can now also think what to make from the unfed starter in Jar #2.

Fed starter after 8 hours

Leaven ready for use and new starter

Saturday morning: Start baking. There are many many recipes on the web and in various cookbooks – start with what suits your taste the best.

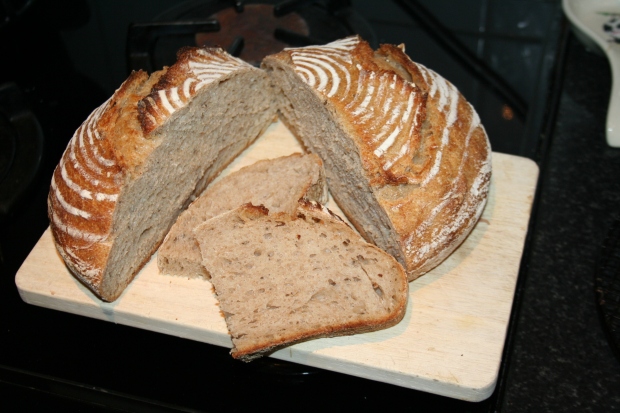
IMG_9088

The ready loaf 🙂

Saturday afternoon: Munch away!


Most of the time, I bake one loaf of sourdough bread which comes to about 1kg and that lasts us for a couple of days and keeps well (if stored properly)- for up to a week. I will publish the recipe shortly 🙂

Besides that, I always make the crackers from my Jar #2. Crackers, waffles, pancakes, crumpets….my brunch favourites!

Recently I also started to try making more things from the dough – different breads and filled pastries and cakes. My hands-down favourite is one with a milled poppy seeds filling. It’s a Slovakian thing 🙂

   # I use spelt flour only for my sourdough starter but it’s up to you what kind of flour you use. It can be white wheat, whole wheat, spelt, rye. Every flour gives a different flavour and consistency to the starter. Some purists only use rye flour for rye bread or spelt flour for certain cakes and keep several jars of different starters at a time. Giving my simplifying tendencies, I only keep one starter. My bread recipe calls for rye leaven and strong white flour for the actual bread flour but I use my spelt starter with rye flour to make the leaven and it works perfectly.

   # Feeding the starter three times to get the leaven works fine for me (and gives me enough discard to make the crackers) but if you don’t have time, some recipes make the leaven directly from the refrigerated starter. So even if you didn’t have time to do it a couple of times, you can still bake bread. Also the other way around – if your plans suddenly changed and you don’t have time to make the bread on Saturday morning, just feed the starter one more time and make the bread on Saturday evening or on Sunday morning. No stress 🙂

   # If anything happens to your fridge starter (like, I don’t know, water from thawing chickpeas gets into it :)) and you still have some unfed discard in the fridge, you can easily revive it. You can also dry or freeze some starter for mishaps like these.

   # A healthy starter smells sour but pleasant. If it gives off an acetone whiff, it’s no good – get a new one or resurrect some from your fridge discard jar.

   # If your starter (or discard) develops a thin layer of black liquid on top, it’s not all lost. This is hooch – just pour it out and the rest is good as new.

   # If a thin layer of velvety film appears on top, likewise, just scrape it off and throw away. This is kahm yeast, an unpleasant but harmless growth.

   # But most importantly, do give it a try. Maybe it won’t be for you. On the other hand, maybe you will never go back to anything other than a good slice of sourdough bread.

Resolutions…

Hello 2018!

How are you doing?! Already getting packed for 2019 maybe – how can it be May next week?! It was like yesterday that I was thinking about my resolutions for the year!

I said I would keep it simple – so back in January I set only three. The first one was to ‘sleep more’, which I was following for a good few (read 2) weeks but now not so much. The second one was to ‘blog more’ – we can all see how that’s going…being end of April now and not a single new post! It might have something to do with the first resolution to be honest. But also the fact that I was busy with other projects, more or less eco-related.

One of eco-related engagements and one I am very happy about is the Zero Waste Festival which I help organise. There were three last year and the first one this year took place in February. Have a look at the Facebook page to see more! If you missed it and would like to see what all the fuss is about, fear not – we are already planning the next one for June…

The third resolution and the only one that I delivered on was to ‘read more’. I didn’t specify any more rules so it all counts – fiction books, factual literature, even magazines. So far for the 4 months the count is 6, which is probably more than for the whole of 2017!

As I said, these books included fiction as well but I would like to share two eco-related titles which I really liked, especially because they were a bit unexpected.

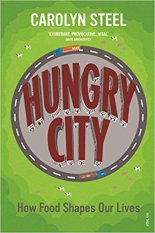
Hungry City by Carolyn Steel

HungryCityAn excerpt from this book’s summary says:

The gargantuan effort needed to feed cities across the world on a daily basis has a massive and vastly underappreciated social and physical impact on both human populations and the planet. Yet few eaters are conscious of the processes that are required to bring food into a metropolis.

This original and revolutionary study examines the way in which modern food production has damaged the balance of human existence, and reveals a centuries-old dilemma that holds the key to a host of current problems, among them obesity, the inexorable rise of the supermarkets, and the destruction of the natural world.

I am not big into history but start talking about the history of food and I am all ears. What can I say, I love food! It was a hugely interesting book that covered all stages of food’s journey – both through the centuries and the physical process of getting food on our plates. It made me even more conscious about what I eat and how it got to my table and why it’s so important to pay attention to these things. (Have you ever thought about the healthiness of the produce planted next to motorways or sprayed by someone wearing a full bodysuit with a facemask on?) The author uncovers a lot of truth in the 7 chapters, each dedicated to one link of the food chain. It’s really food for thought and it made me want even more to grow my own food, however much I can.

The other book was one that got recommended to me by a librarian friend.

The World According to Anna by Jostein Gaarder

AnnaWhen fifteen-year-old Anna begins receiving messages from another time, her parents take her to the doctor. But he can find nothing wrong with Anna; in fact he believes there may be some truth to what she is seeing. Anna is haunted by visions of the desolate world of 2082. She sees her great-granddaughter, Nova, roaming through wasteland with a band of survivors, after animals and plants have died out. The more Anna sees, the more she realises she must act to prevent the future in her visions becoming real. But can she act quickly enough?

Yes, it is a book for a younger audience and yes, the critics might have said it’s a ‘climate change pamphlet for dummies’ but I like it. If you have a teenager at home who is asking questions about the world around them and you want to present them with an enticing book, I highly recommend this. I am probably biased because it talks about the effects of climate change and anything about this topic I regard as very important!

There are already several books on my list and I am dedicated to see this resolution through. (Well this post counts as the first stab at the blogging one…).

The books on the list include:

This Changes Everything: Capitalism vs. the Climate by Hilary Weston

Cradle to Cradle by Michael Braungart and William McDonough

The Tipping Point by Malcolm Gladwell


If any of you have any book suggestions, please do share!

Edible Gifts Easy As Pie

A week ago, I shared my ideas about edible gifts with the folks at the Zero Waste Christmas Festival in Dublin.

As promised, here are all the recipes I mentioned for anyone who’d like to try gift some yummy surprises this Christmas.

If you are looking for sweet, savoury or boozy treats – here are some for you to try – most of them are simple and quick, some of them need a little bit more time and craft, some of them are even fully plant-based.

When gifting a food gift, remember that the packaging is a part of the gift – you can decorate your jars or boxes with festive ribbons, cut-outs, labels or go natural with pieces of holly, evergreen, cones. Forego the impersonal wrapping paper and customise your presents using materials you already have – that pieces of cloth or forgotten Christmas paraphernalia will come in handy!

EG2

Skip directly to recipes

Chocolate Pralines
Chocolate Bark
Cookie Mix
Christmas Biscuits
Raw Truffle Mix
Candied Peel
Crackers
Pestos
Marinated Cheese
Chutneys
Pineapple Vinegar
White Mulled Wine Mix
Eggnog
Mint Liqueur

Sweet

Chocolate Pralines

(inspired by Ina Garten)

Ingredients
300g good dark chocolate
100g good milk chocolate
250ml double cream
2 tbsp liqueur of your choice (I used grenadine syrup)
½-1 tsp vanilla extract

Method

Chop all the chocolate until fine.
Bring the cream in a small saucepan just to the boil, turn off the heat and let sit for 20 seconds.
Pour the cream through a fine mesh sieve into the chocolate. Whisk until all chocolate is melted.
Add vanilla extract and liqueur/syrup if using.
If you are pressed for time or just want the easy way, pour straight into silicone moulds and refrigerate. It will set in about 2-3 hours. Take out of moulds and pack. The less handling the better as the chocolate will thaw.
If you want to go for more of an artisan look, let the chocolate mixture cool in a room temperature for about an hour. Dollop 2 tablespoons of the mixture on a sheet and refrigerate them until firm (about half an hour). Take out of the fridge, roll them in your hands to form a ball and roll them in icing sugar, cocoa powder, dessicated coconut, chopped nuts or anything else you fancy.
These will keep refrigerated for weeks (allegedly, they never lasted me that long!) but serve at room temperature.

Chocolate Bark

If you are looking for something chocolatey with a nice wow-effect, you can try one of these chocolate barks.

In short, it comprises of choosing the ingredients you want in your bark (nuts, candy dried fruit, spices, etc.), spreading them onto a baking sheet and covering with melted chocolate coating or tempered chocolate…or indeed doing it the other way around – depending on your desire to show off the toppings or not!

It might involve a bit of a skill (tempering the chocolate as you might not find a chocolate covering without palm oil) but you can easily source the ingredients in bulk, so it’s worth to try.

Cookie Mix (Chocolate Chip and Walnut Brownies)

The internet is full of recipes for jarred cookie mixes and rightly so, it’s a fun present that is easy to make and looks good.

The idea is that you layer all dry ingredients in a nice jar and gift them with instructions – with wet ingredients to add and how to bake.

This is my one of my favourites:

Layer up in a jar:
1 1/2 cups (300g) granulated sugar
1 1/3 cups (160g) plain flour
1/2 teaspoon baking soda
1/4 teaspoon salt
3/4 cup (75g) cocoa, unsweetened
2 cups (300g) semisweet chocolate chips
1/2 cup (75g) coarsely chopped walnuts or pecans

Wet ingredients to be added:
2/3 cup (160g) melted butter, divided into halves
1/2 cup (125ml) boiling water
2 eggs, lightly beaten
1 teaspoon vanilla extract

Method
Heat the oven to 180 C. Grease and flour a 30x20cm baking pan.
In a large bowl, combine cocoa and baking soda. Blend in half of the melted butter. Add boiling water and stir until well blended. Stir in sugar, beaten eggs and remaining butter. Stir in flour and salt.
Stir nuts and the chocolate chips into batter. Spread batter in the prepared baking pan. Bake for 35 to 40 minutes or until the brownies are firm and begin to pull away from sides of pan.
Cool before cutting into squares. Voilá!

Christmas Biscuits

If you are a baker or do not shy away from mixing some flour, butter and eggs, you can always bake nice Christmassy biscuits, pop them into a jar or a box and I guarantee you they will be received with thanks.

Every year, I make these ‘gingerbreads’ – in inverted commas because they, in fact, have no ginger in them. They are actually honey cookies which are soft and taste like Christmas.

Honey Cookies (Medovníčky)

Ingredients
500g plain flour
190g honey
150g icing sugar
60g butter
2 eggs
1 tsp baking soda
3 crushed cloves
½ tsp ground cinnamon

Method
Mix all the ingredients into a (somewhat sticky) dough.
Divide into halves and place in a bowl, cover with a plate or wrap in a beeswax wrap (instead of cling film) and leave to rest overnight in a cold place.
Knead for a few minutes before rolling out.
Preheat the oven to 180C.
Roll out to about 5mm thickness and cut out shapes with cookie cutters.
Place on a baking sheet with baking paper or silicone mat.
Bake for 6-8 minutes – do not over bake – the edges shouldn’t be browned.

The cookies can be decorated with lemony sugar icing – whisk 1 egg white, 140g icing sugar, juice from one lemon until the sugar is dissolved and the icing is shiny and thick. Fill in a freezer bag or a paper cone with the icing, make a tiny hole in one corner and decorate.

However, if you don’t have time to do that just brush the cookies with a beaten egg white or whole egg before baking. You can also add a dollop of jam and a walnut half on top.

pernicky

Some from last year…

Raw Truffle Mix

If you are looking for a cookie version for your vegan friends, here’s an idea.

The recipe is courtesy of Íde of Bring Your Own – you can buy all the ingredients in bulk in their stall or, if you’re pressed for time, even buy the mixture already jarred.

It’s super easy.

In a nice jar, layer up 50g of almonds, 50g of dates and 10g of coconut flakes. (Feel free to double it up for more truffles.)

Method: Tip out the coconut flakes in a blender and blitz them to shred them. Tip out on a plate and put aside. Put the rest of the ingredients in the blender and blend until a sticky consistency. Roll out small balls and finish them rolling in the shredded coconut. That’s it!

Candied Peel

I like this recipe because it’ using up orange or other citrus peel that would otherwise end up in the compost bin.

I takes a little bit of time to make but it’s mostly waiting time – plan accordingly.

I made it a couple of times and really like the recipe from Bright-eyed Baker which you can find here.

My only note would be don’t cover the pan so that the water can evaporate – I made this rookie mistake the first time I made it…

Savoury

Crackers

There are few things that go together better than crackers and cheese, or even better, crackers, chutney and cheese.

You can make up a hamper filled with this holy trinity of foodiness…here are a few recipes to help.

Sourdough crackers

If you heard about sourdough and were intrigued or even better, gave it a shot and realised it’s the best thing ever, I am happy for you. If not, maybe try some sourdough bread and you may just become interested enough to try it.

If you do have sourdough and feed it regularly, you know you end up with quite some of the ‘starter discard’ but don’t do what it says on the tin. Don’t discard it – rather turn it into delicious crackers.

This recipe is an adaptation of a recipe from Anne Marie Bonneau, the Zero Waste Chef, which you can find here.

Ingredients
1 1/2 cup unfed starter from the refrigerator
6 tbsp olive or sunflower oil
1 cup rye flour
1/2 cup spelt flour (plain or wholemeal)
1/2 tsp salt
1/2 tsp baking soda
3 tbsp linseed

Method
Combine starter and oil in a non-metallic bowl. Add flours, salt, baking soda and seeds. Combine. If necessary, knead the dough a few times to incorporate the last bit of flour. Cover bowl with a plate or towel and let rest for six hours at room temperature (I often skip this step and it’s fine – just rest it for about 15-20 minutes before making).

Store in the fridge after this if you won’t bake right away. The dough will keep in the refrigerator for about a week. Let it warm at room temperature for 15 minutes to half an hour to making rolling easier.

When you’re ready to bake, divide the dough into quarters on a generously floured surface.
Preheat oven to 190C.
Roll the dough out about two millimeters thick.
Transfer the dough to ungreased baking tray.
Cut into rectangles with a pizza cutter or a knife. I do this on the working surface rather than on the baking tray – but that’s me 🙂

Bake for 6 to 8 minutes, turn crackers and bake 6 to 8 minutes longer. Crackers are done when crispy and slightly browned. Know your oven and baking trays – some may bake quicker and some longer (glass baking trays are usually slower to bake on as I learned).
Transfer crackers to a rack to cool. Store in a glass jar. These also freeze well if you don’t munch on them all at once.

crackers

Easy crackers

If sourdough isn’t your thing, fear not, these easy crackers from The Kitchn are as good.

Ingredients
3 cups (360g) plain flour, or a mix of plain and whole grain flours
2 tsp sugar
2 tsp salt
4 tbsp extra-virgin olive oil
1 cup (250ml) water
Optional topping: 1 tbsp sesame seeds, 1 tbsp fennel seeds, 1 tbsp poppy seeds, 1 tsp sea salt

Method
Heat the oven to 230°C and place a rack in the lower third of the oven. Sprinkle a baking sheet lightly with flour and set aside.

Mix together the dry ingredients. Add the oil and water. Stir until a soft, sticky dough is formed. If a lot of loose flour remains in the bottom of the bowl and the surface of the dough, add more water a tablespoon at a time until all the flour is incorporated. Let it rest for 5-10 minutes.
Divide the dough into halves and shape the dough into a square. Working from the center of the dough out, roll the dough into a rectangle roughly 2mm thick or thinner. If the dough starts to shrink back as you roll it, let it rest, uncovered, for 5 minutes and then continue rolling.
Sprinkle dough with topping (optional): Brush the surface of the dough very lightly with water. Combine the seeds in a small bowl and sprinkle half of them evenly over the surface of the dough.
Cut the dough into cracker-sized rectangles using a sharp knife. If you are after more fancy shapes, use cookie cutters.
Transfer crackers to baking sheet and prick with fork to prevent them from puffing during baking. It’s fine to crowd the crackers very close to each other.

Bake the crackers in the oven for 12-15 minutes, until the edges are browned. Thinner crackers will bake more quickly than thicker ones; you can remove the crackers as they brown to your liking and continue baking the rest. While the first batch of crackers is baking, roll out and cut the remaining dough.
Transfer the baked crackers to a wire rack to cool completely. The crackers will crisp further as they cool. Store the crackers in an airtight container on the counter for 3-5 days. If you’re crackers are a little old and less-than-crispy, lay them on a baking sheet and put them in a 180C oven for a few minutes to re-crisp.

Pestos

If you are heading to a Christmas party and want to bring some crowdpleasers to the savoury table, you can make some pesto – it’s quick, easy and you can even use up things otherwise destined for compost.

Also, you don’t need to feel limited by the classic components – mix up your nuts, greens or use nutritional yeast instead of cheese if you want your pesto be fully plant-based.

I will borrow a carrot pesto recipe from Lindsay Miles of Treading My Own Path which you can find with 3 other great pesto recipes here.

Carrot Top Pesto

Ingredients
2 large handfuls of carrot tops
1 large handful of basil
1/3 cup (50g) cashew nuts (or other)
9 brazil nuts (50g) (or other)
2 tbsp olive oil
1 large garlic clove
1/2 avocado (or 3 tbsp of olive oil)
1/3 cup (30g) nutritional yeast or grated cheese (or to taste)

Method
Blend the nuts in a food processor until they resemble coarse breadcrumbs and set aside.
Chop or crush the garlic, then add the basil leaves and carrot tops in the blender and blend until fine. Add oil and avocado and blend again. Add nuts and cheese/yeast if using and pulse to combine. Add more oil to taste if required. Store in a glass jar in the fridge, and use within 5 days. Can be frozen.

Marinated cheese

If you are putting together a foodie hamper, you can include a jar of marinated cheese. It’s easy, quick and looks and tastes good.

Ingredients
Brie or other soft cheese
Shallots/onion
Red capciscum pepper
Dried porcini mushrooms (a small handful)
Peppercorns
Bay leafs
Garlic cloves
Salt
Parika
Chilli flakes
Sunflower oil

Method
Cut the cheese into 5mm slices and sprinkle with salt. Layer up in a jar with thinly sliced shallots, pepper and halved garlic cloves. Soak the mushrooms in a bit of boiling water for few minutes, then squeeze out the water and add to the jar. Add a couple of peppercorns, a bay leaf and some chilli flakes. Work your way up to fill the jar. Once full, pour over sunflower oil to cover everything. Leave in the fridge for 5 days for flavours to combine. The cheese can be served with crusty bread or crackers. Leftover oil can be used in cooking – salads or aforementioned pestos are a good choice!

Chutneys

The third part of the cheese-cracker-chutney combination may require a bit of effort and time but it’s definitely worth it. Preserved in sterilised jars will keep for a year (and maybe even a tad longer).

I took inspiration from this classic apple chutney recipe.

Classic Apple Chutney

Ingredients
1½ kg cooking apples, peeled and diced
450g granulated sugar
100g molasses
500g raisins
2 medium onions, finely chopped
2 tsp mustard seeds
2 tsp ground ginger
1 tsp salt
700ml cider vinegar (I used a mixture of homemade apple scrap or pineapple vinegar)

Method
Combine all the ingredients in a large, heavy saucepan. Bring the mixture to a boil over a medium heat, then simmer uncovered, stirring frequently, for about an hour, or until thick and pulpy. Remove from the heat, leave to cool and transfer to sterilised, clean, dry jars and seal.

chutney

Chutneys ready to impress…

Raw Pineapple Vinegar

If the recipient of your edible gift is a fan of healthy homemade concoctions, you can surprise them with a raw apple cider or pineapple vinegar.

The latter I came across when a pineapple I bought started to go sour but I refused to throw it out – I looked up a recipe for a fruity vinegar and the result pleasantly surprised me. I used this recipe from the Fermented Food Lab.

Ingredients
½ pineapple
4 cups (1l) water
1 cup (180g) brown sugar (I used a mix of granulated sugar and molasses)
2 whole cloves

Method
Cut up the pineapple into big chunks and leave the skins on.
Mix the the sugar in 4 cups of water until sugar dissolves.
Add the pineapple and the sugar water to a glass jar.
Add in the cloves.
Cover with a cloth and secure with a rubber band.
Store in a cool, dark place (away from direct sunlight) for 3-4 weeks.
Stir the pineapple every few days to aerate it and prevent mold from growing on the surface.
If mold forms on the surface, scoop it out. Don’t worry, the vinegar is still good.
Taste the vinegar after 3 weeks. If it tastes sour and acidic like vinegar, strain out the pineapple chunks and bottle it. If not, let it ferment for another week. Repeat until it tastes like vinegar.
Store in a glass container or bottle in your pantry for several months to a year.

Use in salads or in a chutney 🙂

If you like apples and use a lot of them for cooking, you may be left with some cores and peels that seem to be no good for anything else but that’s a mistake – with the same method as above (fermentation of sugar water by fruit), you can easily make apple cider vinegar. Find the full recipe here.

Boozy

If there is one part of festive food that I look forward to during the year it’s the boozy concoctions. Casually sipped with friends while catching up, sweet enough to be a dessert but somewhat too sweet to drink too much which avoids the next day hangover. Perfect.

The following recipes are also easy to make, don’t need heap of ingredients and are quite easy to buy in bulk.

White Mulled Wine Mix

Do you think that all mulled wine has to be red? Au contraire. White mulled wine is just as (if not more) delicious.

Put together a bottle of wine, an orange and jarred spices and you have a gift that won’t go unappreciated.

Spice Mix
55g white or brown sugar
5 cloves
3 cardamom pods
1 star anise
A piece of cassia bark or a small piece of cinnamon

Layer up in a small jar. Print out the following instructions and attach to the jar.

Add: 750ml white wine, 250ml water (optional), 3 slices of orange/lemon. Bring almost to boil. Strain, reserve spices and serve. Add 55g of sugar and repeat.

Eggnog (Vaječný koňak)

This recipe was definitely the favourite sample at my workshop. There are many methods and recipes for this Baileys’ type of liqueur – the following one is quick, easy and delicious. (It does contain raw eggs so if you prefer, look for recipes that cook the egg yolks in a bain marie first.)

Ingredients
3 egg yolks
1 tbsp sugar
1 tsp vanilla extract
1 tin condensed milk
300ml dark rum (the Aldi one works nicely)

Method
Whisk egg yolks, sugar and vanilla extract until foamy. Add condensed milk and whisk for further 3 minutes. Stir in rum and taste, add more rum if you’d like. Pour into a clean bottle, store in the fridge and use up in a week.

Mint Liqueur

If you prefer something longer lasting and also plant-based, you may try this simple mint liqueur.

Ingredients
350 ml vodka
300ml water
30 mint leaves
300g cane sugar
Zest from ½ lemon

Method
Shred the mint leaves with your hands and place in a dark container with the lemon zest. Cover with vodka and leave to macerate for 3 days. Then strain through a fine mesh sieve, a coffee filter or a muslin cloth. You should get a clean liquid.
Over a medium heat, dissolve the sugar in water. Add this syrup to the mint macerate, transfer into a clean bottle and leave to ripen for three weeks in a dark place.


Zero Waste Fairy’s Thoughtful Gift Guide

I created the below (not only) Christmas gift guide last year to help you give greener gifts to your family and friends. As we are getting closer to the big day, it’s relevant again…so, in the spirit of the 5Rs, you are more than welcome to reuse it again!

Happy (conscious) shopping, making or just giving!

P.S. If you are based in Dublin, Ireland and would like some more inspiration about how to waste less this festive season, pop in to the Zero Waste Christmas Festival that is happening on Saturday the 9th of December in the St. Andrew’s Resource Centre on Pearse Street. There will be workshops, a swap shop with a dedicated Christmas jumper rail, bulk and unpackaged food and non-food products, ZW essentials, natural cleaning products and more!

I will be preparing some edible treats if that’s your gift of choice at my workshop at 12noon. You are welcome to join me and sample away!

[Entry to the Festival is free but a workshop pass is needed to attend any number of workshops on the day. Buy tickets and see more info here.]

comingtozerochristmastree

A late (autumn) post…

Hi! I am back. I mean, not that I ever left but blogging was pushed aside by many other things – some eco-related, some less so 🙂 Let’s just say that a new post is overdue.

As we sailed through the busy summer months, my favourite season came again – Autumn! I love autumn. I love all of its stages. The first cautious September days with their fresh mornings that signal the summer might be over. The mid-September Indian Summer days that say maybe not quite yet! Blackberries everywhere you look and beautiful tree colours. And the moment when I realise that the gradual transformation is complete and the season has definitely changed.

Most of all I like the autumn air. Is it just me or is it much cleaner than in any other season? How every smell is somehow magnified. Maybe it’s just because the smell of fallen leaves and bonfires remind me of my childhood. Or maybe because it travels better in colder temperatures…let’s leave it to mystery.

As the days get colder, I start looking for the scarves and gloves I put away in March. The clocks go backwards and the dark nights slowly set in so that all I want do is cuddle up with a book and a mug of tea. One day there are pumpkins everywhere and then as soon as Hallowe’en is over, they are replaced almost overnight by Christmas decorations. Is that still autumn or is that winter already? I can never decide.

Autumn, being a time for nature to wrap up an go into hibernation, patiently resting through the cold months, is (for me) just the opposite for the mind – I can feel ideas brewing and awakening. While not distracted by all the fun to be had outdoors, I can focus on thoughts, plans, intentions, solutions. It really is a magical time.   

Is it just a nice coincidence then (at least in Ireland and the UK), that autumn is full of environmental drives? The first week in September is the Zero Waste Week, the last week in September is the National Recycling Week, October is the National Reuse Month. Worldwide, November is  the World Vegan Month, Black Friday was re-dubbed as ‘Buy-Nothing-Day’ and on and on. To be honest, who cares if  it’s a coincidence or not. The main thing is that these initiatives are getting more to the forefront of people’s minds and making mainstream news.

Before I go back to more regular updates, here a few snaps from some interesting events over the last couple of months.

Honey Celebration

I got my first hive share from Brookfield Farm back in 2016 and since I agree with what Ailbhe, the owner and chief beekeeper, wants to achieve, I sponsored another one this year. As a part of it, I got to go to the Honey Celebration back in August. It was one wet day but as they say, there is no bad weather, only bad clothes. Here is what was waiting for us in Nenagh…

This slideshow requires JavaScript.

Zero Waste Festival

Following the success of the inaugural Zero Waste Festival on June 25th, the September edition took place during the Zero Waste Week and it comprised of 7 days full of events, markets, swap-shops and overall ZW merriment. This time around, I was happy to become a member of the organisers’ team which was a lot of fun! And guess what…there will be another festive festival soon

This slideshow requires JavaScript.

Reuse Month Festival

The first Reuse Month Festival took place in a repurposed old fire station in Rathmines in October. It was a chilly day but a fun one!

This slideshow requires JavaScript.

A day in the life of an aspirational zero-waster

I wake up in the morning and shuffle to the bathroom to brush my teeth and wash my face. While squirting my ‘compromise’ toothpaste (it’s all natural but it’s still in a plastic tube) on my bamboo toothbrush I consider if I’m maybe ready to try that homemade toothpaste with coconut oil. Well, the last one I bought at a farmers’ market had bentonite clay in it which is really just ‘white mud’. Let’s just say that didn’t work.

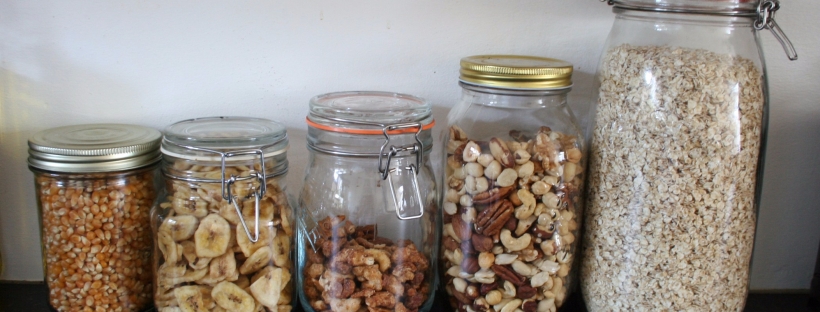
I put on my cycling gear and head to the fridge to take out the food for the day prepared last night. Overnight oats, some leftovers for lunch, another jar with snacks – nuts, seeds and dried banana chips I managed to buy in bulk. Sometimes, when I’m packing the salad, the thought of that jar weighing possibly twice as much as those leaves crosses my mind, but it’s quickly followed by the ‘more exercise for me so’ thought.

After-work jars...

My daily jars 🙂 – including the Friday’s ‘used loose tea for compost’ jar

I kiss my other half goodbye and hop on the bike. As I am approaching the cars stuck in the bottleneck leading to the city centre, I am silently judging them from my high-horse, ehm, saddle…as they sit in their gas-guzzling pollution-puffing machines. I smile at my efficiency but frown at all the smoke I have to sniff in order to be green. Go cyclists!

I take a shower (which could be shorter but the hot water feels so gooood), innerly praising my employer for providing the facilities. As I am using my shampoo bar on my hair I’m thinking about the possibility of going no-(sham)poo or just water washing. But then again, could I handle smelling like vinaigrette? I put on the store-bought deodorant which I can’t wait to use up because I want to have a go at the homemade stuff. A mental note creeps in: get arrowroot powder for the recipe.

Fresh as a daisy after the morning workout (streamlining does work – commuting on the bike means no need to go the boring gym – yay!), I make myself a cup of tea. I’m feeling smug praising my decision to stop drinking coffee all those years ago. It was long before ZW and it started as an experiment but it seems to have taken hold. The tea is loose, a great maté blend from the tea shop where you can fill your own tin. It’s funny how it’s easier to get luxury items without packaging, like tea and nuts, but looking for a few lentils in bulk can be a nightmare. I wish there was a proper bulk shop around but I’m happy with the bulk options I found so far (and they seem to be growing!). After steeping the tea, I put the leaves into a jar and I explain to my curious colleague that at the end of the week, I bring the jar home to empty it in my compost bin. I wish my company had compost bins. They’re doing well to have recycling bins in, it’s a start. Perhaps, if I put my mind to it, I can make them change theirs.

As the days continues, I go about my work. From time to time I think how great it would be to work for a properly green company, one that works in the sustainability industry. Immediately afterwards I think that working on my own green venture would be even better. One can dream. Or plan 🙂 While snacking on my nuts from a jar, I occasionally check the local Zero Waste Facebook page. Sometimes I comment and think back about the beginnings of my ZW journey…how much I learned and how much I changed my habits since! Figuring out what worked and what didn’t was the fun part! And it still is.

For lunch, I have my no-food-waste-in-my-house leftover provision. After I’m finished, I casually check the canteen’s general  bin for any recyclables. Most of the days, there are some. As I’m washing them, I think about what would make others actually give a crap and at least recycle. Then I think back to those days when I had a ready-made salad packed in a plastic bowl for lunch, a plastic bottle of orange juice and a packet of crisps or a Kit-Kat for mine. Thankfully, those days are gone. I put the recyclables where they belong and think that if there was a deposit system for plastic bottles, it would be much easier to get people to change. I just can’t grasp how all the plastic bottles get used for about 30 minutes and then get dumped. Sigh.

After lunch, rain or shine, a short walk is in order to clear the head and get some (reasonably) fresh air. I walk along the canal and pass a lunch food market with lovely smells from all the different  kitchens. Instead of looking at their menus, however, I look around at the amount of polystyrene trays and plastic cutlery left behind. They are in a bin in the best case, near the bin or, in the worst case, on the footpath. For about the fifth time that day, I cannot help thinking if my own ZW efforts can change anything. All the plastic I avoid and all the rubbish I don’t throw away will still be created somewhere. I feel a bit down but then I realise it doesn’t matter what other people are doing right now. As long as I keep doing my bit, there is a chance I can spread my way of thinking. Then I remember that activism is the best way to change things so I decide that I will send a message to the market organisers to see if they could maybe provide more bins or compostable food containers. Or, even better, to encourage customers to bring their own lunchboxes. Bit by bit, starfish by starfish.  

I finish up my work, gather all the empty jars from the day and rattling like a bottle bank I hop on my bike. As I am cycling and thinking what culinary marvel I will try to create for dinner (the veggie box arrived yesterday so I have lots of fresh produce to play with), I make a list in my head of things to do…water the raised bed with some semi-decent gardening attempts, change the beer traps for slugs who love the aforementioned attempts, buy some baking soda, trying to find that Redecker dish brush online and find out who could crochet some dishcloths for me…I am flying on the bike (reasonably restricted by the jars’ clanking) but have to, yet again, stop behind a puffing bus at the lights. Ah well, ups and downs, ups and downs.

It’s strange to think that just a couple of years back, none of these thoughts crossed my mind in an average day. I guess this is what happens when you find a cause that you really want to get behind. But I do sometimes wish I didn’t have to think about these things so much and living sustainably was the norm. Until then, I’ll happily do it all again tomorrow.

Dandelioney

It’s something I kept hearing about when I was a child but we never actually made it at home. Probably because we lived four doors up from a beekeeper who always supplied us with amazing local honey. I am talking about ‘dandelion honey’, another Spring treat that’s quite satisfying to make!

It’s a very simple, 4-ingredient recipe – water, lemons or oranges, sugar and dandelion flowers.

Recipe

  • 450 dandelion flowers
  • 1.5kg sugar (white or brown)
  • 1 lemon
  • 1 orange
  • 1.5 l water

Step 1 – Collecting

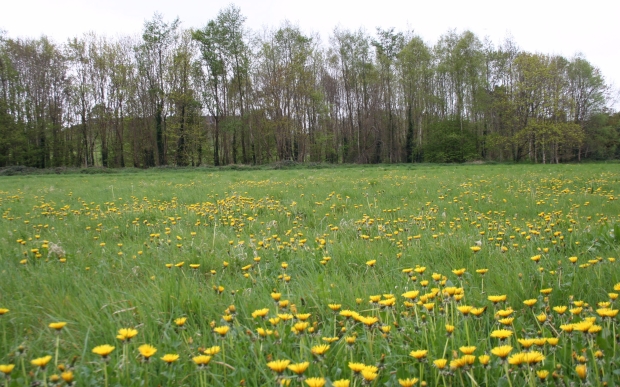
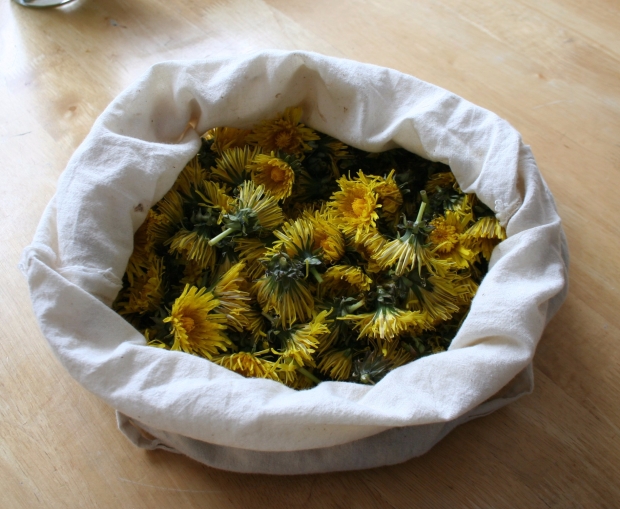
Since it’s best to collect the flowers and steep them without washing (the pollen strengthens the flavour), I picked them early in the morning after a night of rain and before the doggies could get to them. I guess since the extract is boiled afterwards, it’s pretty safe to use them without washing. A little piece of advice: the collected dandelion heads will stain your hands and your bag so use one that can get dirty and perhaps a pair of gloves.

Park meadow

There were enough dandelions for me and the bees…


Collecting

It was about half a bag of dandelion heads…

Step 2 – Steeping

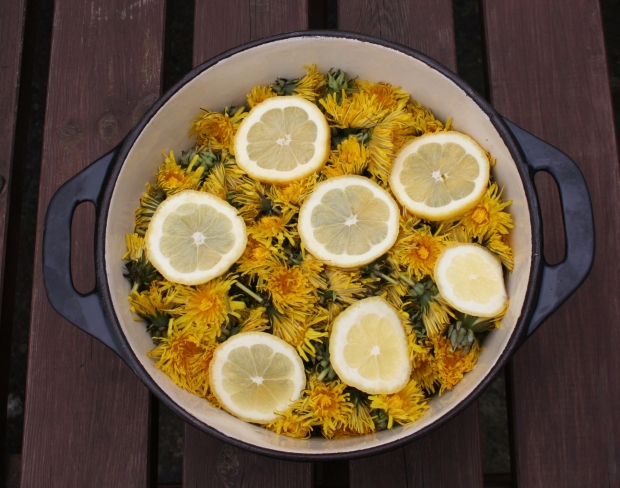
Cover the dandelions and sliced lemons/oranges with 1.5l of cold water. Bring to the boil, simmer shortly, turn off the heat and leave to macerate for 24 hours.

Steeping

A pretty mix

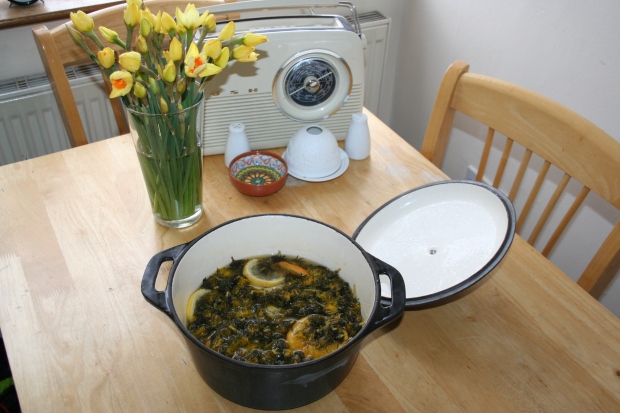
After macerating

After 24 hours…

Step 3 – Cooking

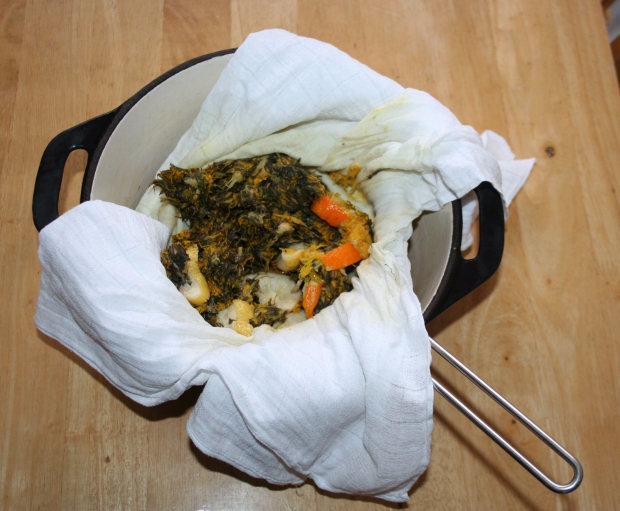
Strain the mixture through a very fine sieve/muslin cloth/nut milk bag/tea towel or whatever you can find and squeeze out all the liquid.

Straining

Squeeeeeze!

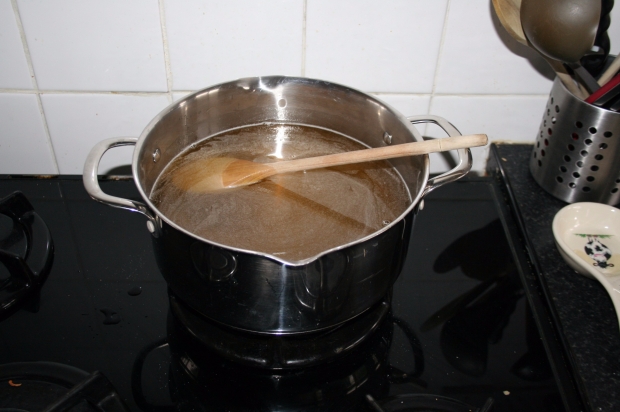
Add 1.5kg of sugar and bring to the boil. Simmer uncovered on low heat for about 1.5 hours or more, if you think it’s too watery but the mixture will thicken when cooling so don’t be too stressed!

Cooking

Add sugar and simmer.

Step 4 – Preserving

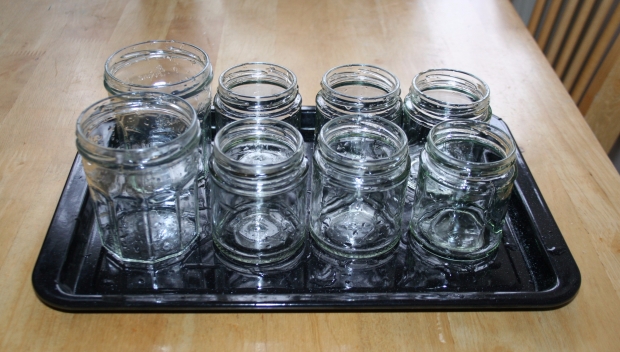
Prepare the jars by washing in hot water and sterilising them. (Put them in a cold oven and set the temperature to 100C/212 F, when the temperature is reached, leave them in for 15 minutes, then turn off the oven but keep the jars warm until you need them.)

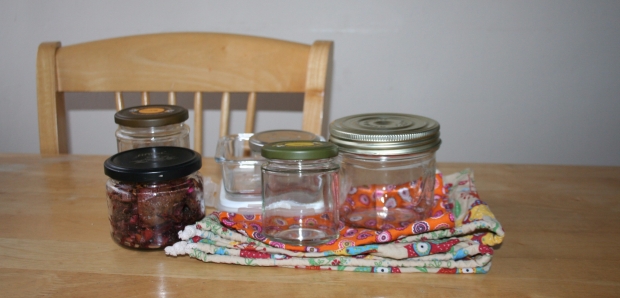
Jars

Ready to be sterilised.

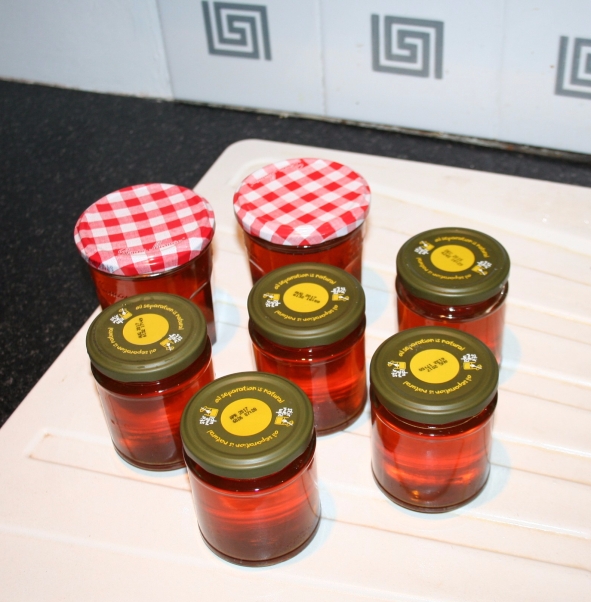
The above recipe makes about 1.5l of syrup (5 smaller jars and 2 Bonne Maman jam jars :)).

Pour the syrup into warm jars, close tightly, turn upside down, cover with a blanket or towel and leave to cool. Done!

Ready

The colour!

The consistency and colour of the finished product are very much like that of proper honey and even the taste and smell are very similar.

This honey contains significant goodies – trace elements and vitamins such as calcium, magnesium, iron, sodium, phosphorus, silicon, vitamins A, B and C and the antioxidant lutein. Who knew…

Another good thing about this homemade sweetener is that the only waste I created was the paper bag from sugar.

As a bonus, even though I am not an expert, it looks like a valid vegan honey replacement if you happen to be looking for one.

I cannot wait for our Sunday pancakes and putting it to the test in some oaty flapjacks! What would you use it for?

Where the wild things grow…

My favourite season may be autumn but who wouldn’t love spring? When almost suddenly, after a long grey period, there are colours all around. Greening trees, yellow daffodils, blue hyacinths. The smells of spring are even more enticing. Freshly cut grass, blossoming gorse bushes and fresh crisp mornings with a promise of a sunny day.

Walks and runs are becoming more interesting, there are suddenly things going on…plants, animals, everything is waking up. One of the ultimate spring signs for me is a little green plant with a distinctive smell and taste. Wild garlic. Called ‘bear’s garlic’ in Slovakian, this plant with dark green leaves at first and beautiful white flowers later on, is bursting with flavour and is the first dose of natural vitamins available after the winter hibernation.

IMG_0340

Spring harvest

Wild garlic is very popular in Slovakia, growing happily in woods and creeks, free for all. Sure, the climate in Ireland is similar and it’s even more humid – it must be everywhere here as well, me thinks. So I went into to the woods, searching high and low but no luck, I am afraid. Well, that was last year…

This year, I had a better idea and asked people who  actually might know. (All hail Facebook!) I was right and the power of community demonstrated itself once again. Lovely people identified a couple of spots in and around Dublin (Phoenix Park next the the American Embassy and the Knocksinna Wood in Enniskerry, to be precise) and they were really spot on. Being a very happy bunny, I picked enough leaves to eat raw and make some pesto from the rest.

The Allium Ursinum plant can be invasive so if there is a place it likes, it can overgrow there really fast. I still made sure though I only took as little as I needed and didn’t damage any other plants. You know, like a sensible human being.

The raw leaves can be added to a green salad or used as a garnish for savory meals. My favourite use is simple though – on top of an open sandwich of sourdough bread and butter. A version with spreadable cheese works very well too.

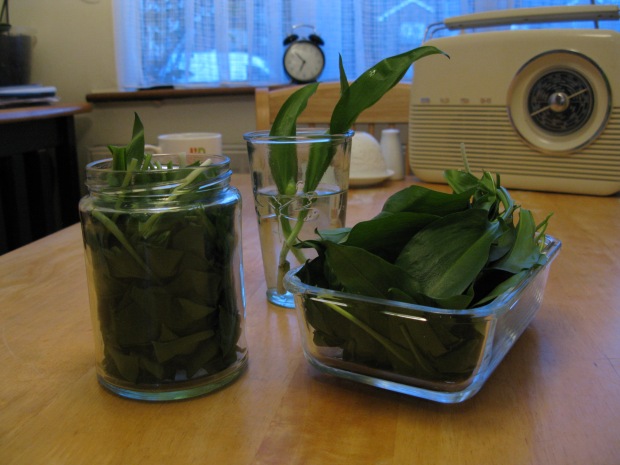
The collected leaves will last for a few days in the fridge, in an airtight container. You can also pick them leaving longer stems and store them in a bouquet in a glass of water in the fridge.

They can be also frozen I hear but I haven’t tried that yet so cannot vow they won’t turn into a gooey mess when defrosted. I will try it though because any way to reminisce about Spring when there is a winter storm behind the window is very appealing.

What I did try, and with a decent level of success may I say, was making a few jars of wild garlic pesto. There are a good few recipes online, I picked the Donal Skehan one and adapted it a little.

As with any pesto, it’s a combination of a green part, a cheesy part, a nutty part and an oily part. These are mixed together with some basic seasoning to a consistency you like.

IMG_0350 (1)

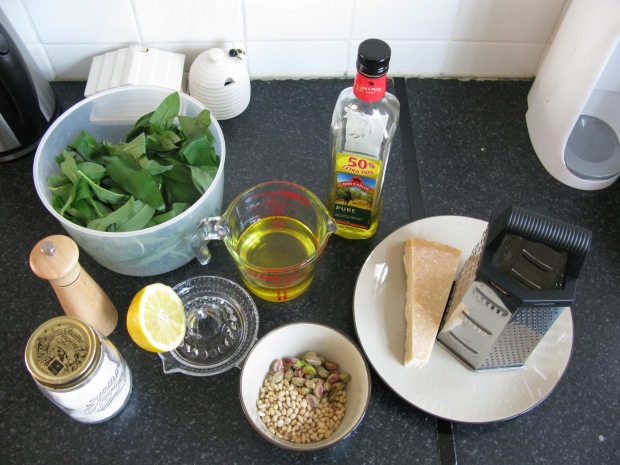
Ingredients

My recipe

200g wild garlic leaves (washed and stringy stems removed)

120g parmesan

100g nuts (mixture of pine & pistachio)

250ml ‘pure’ olive oil (the normal one)

Juice of half a lemon

Salt

Pepper

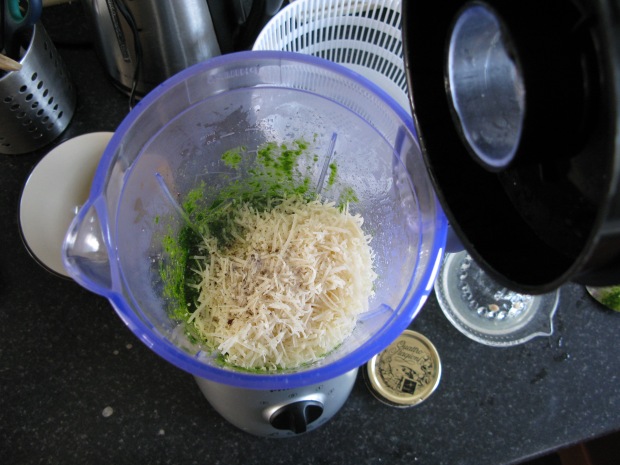
Put all the ingredients into a blender/mixer and mix together. Loosen with some more oil if you want. Pour into sterilised jars and cover with olive oil to create a seal.

img_0353.jpg

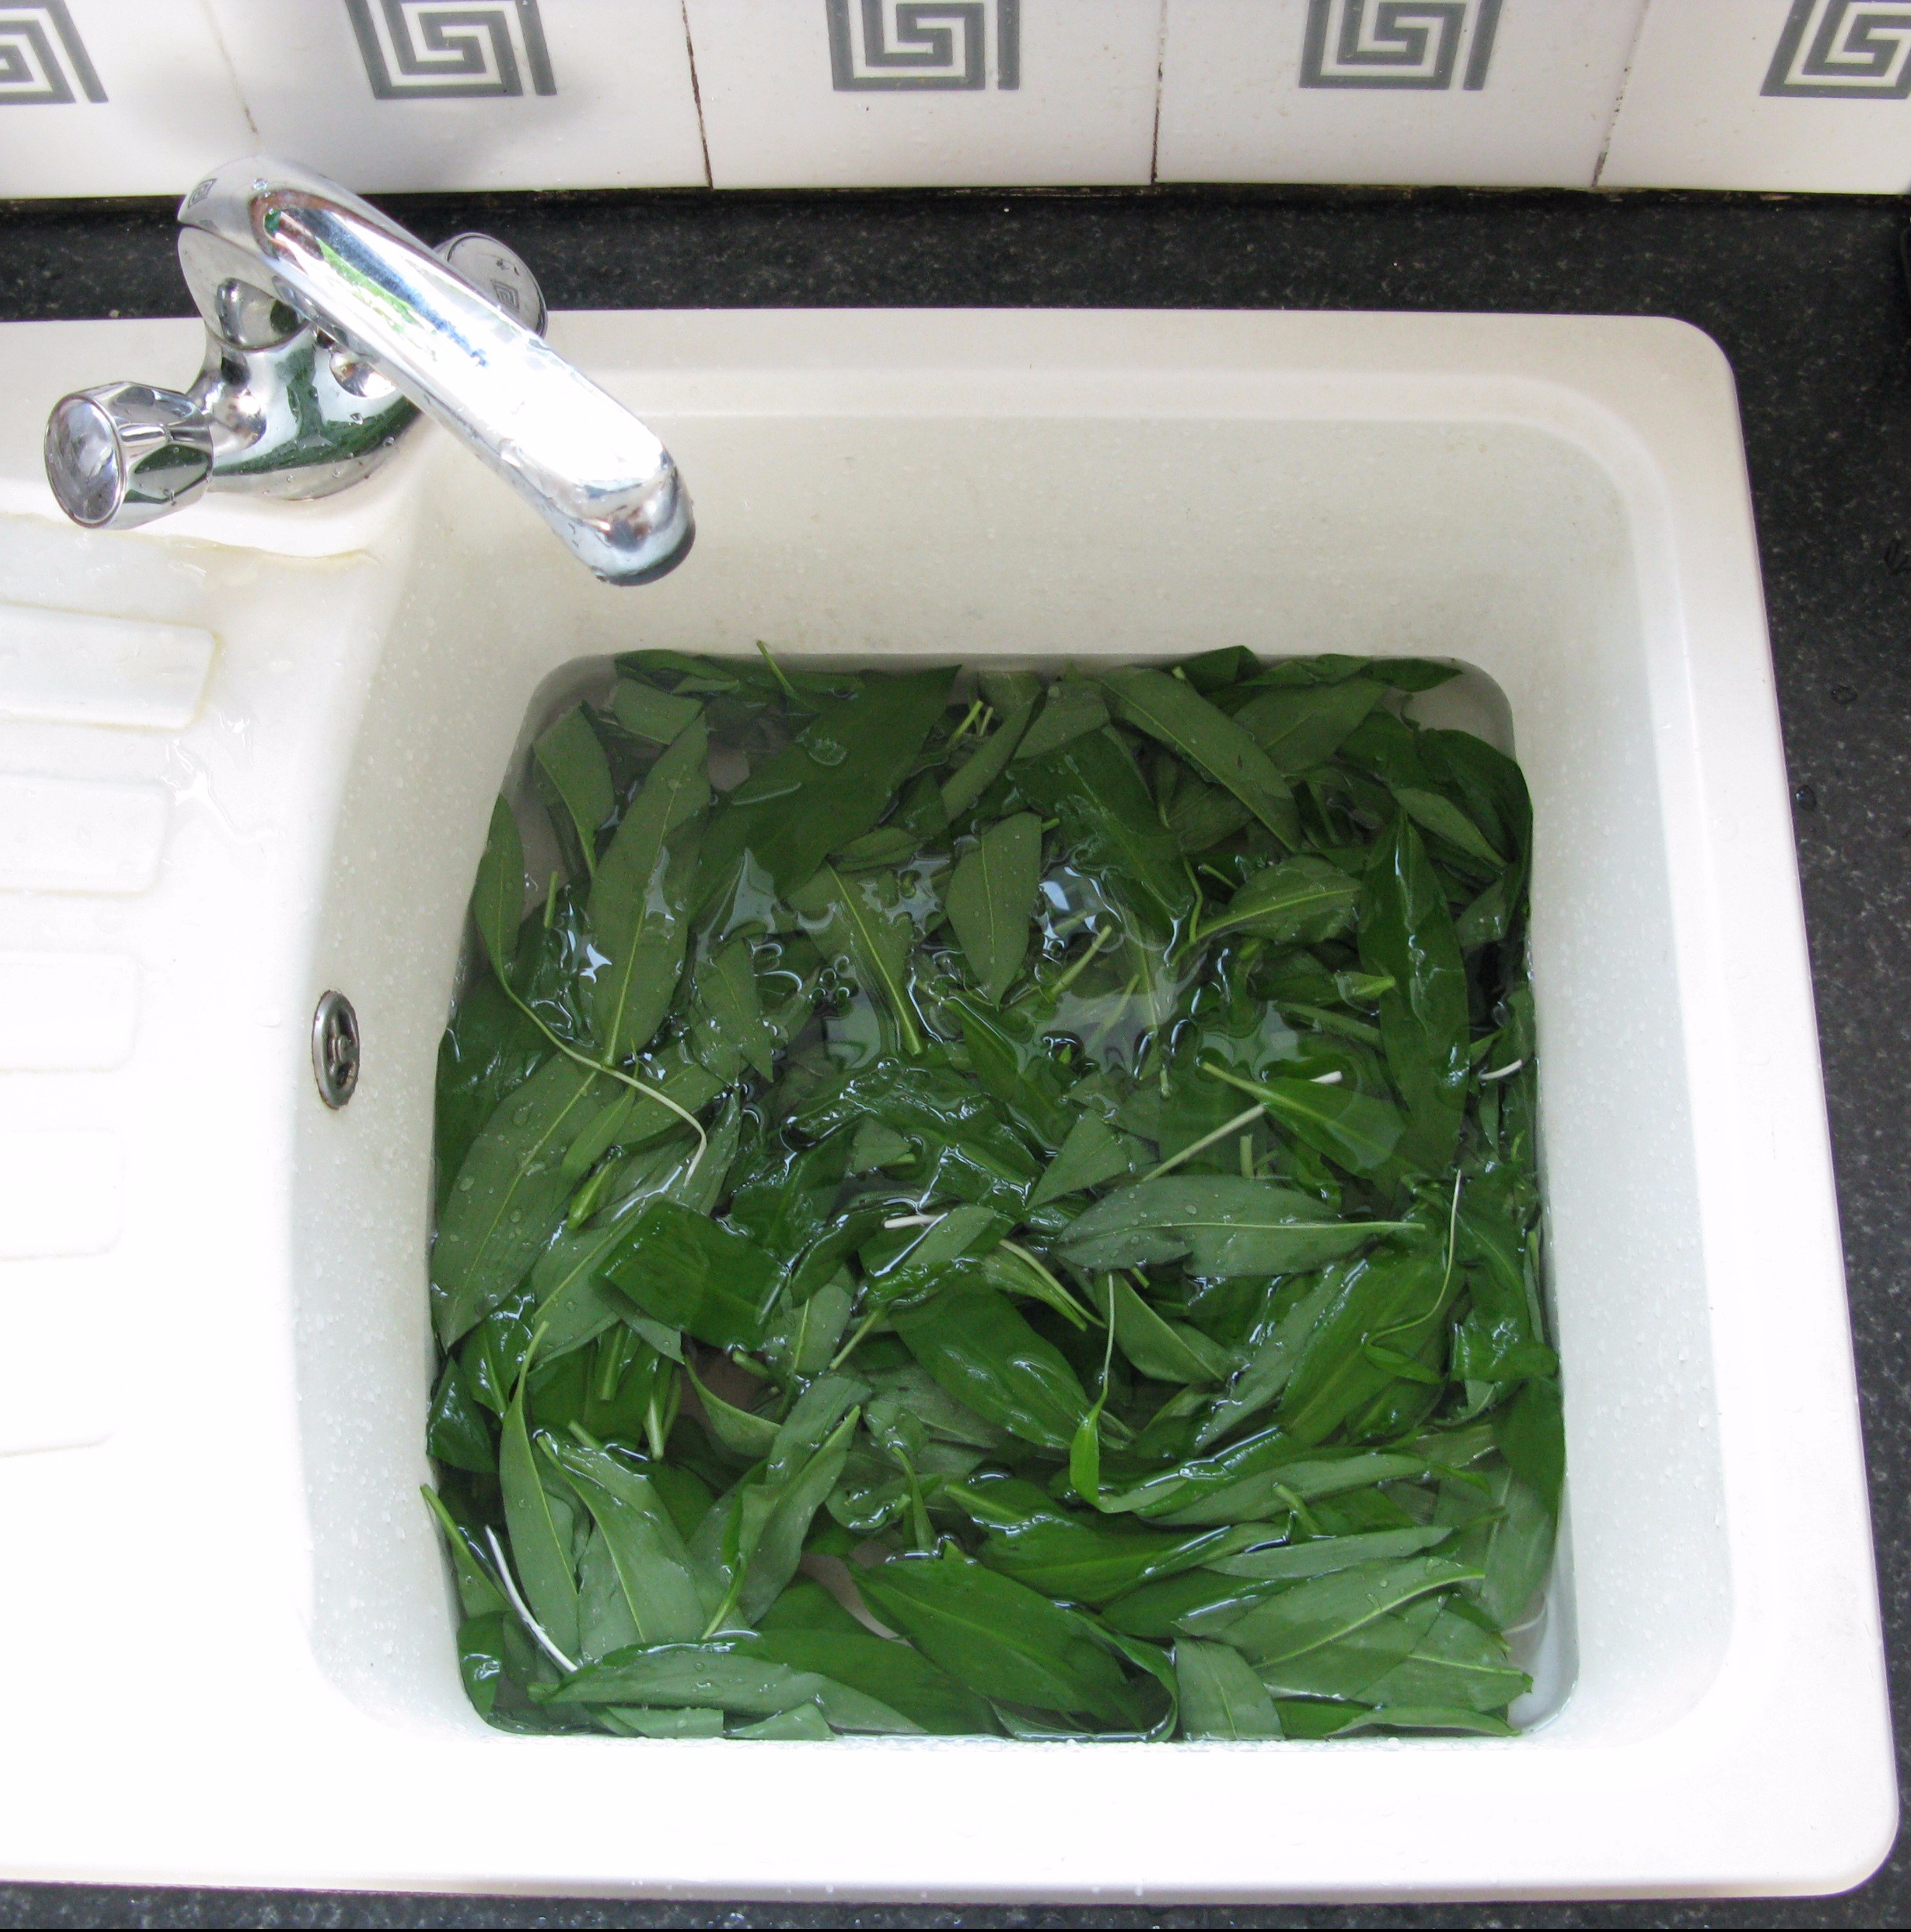
Wash it…

IMG_0354

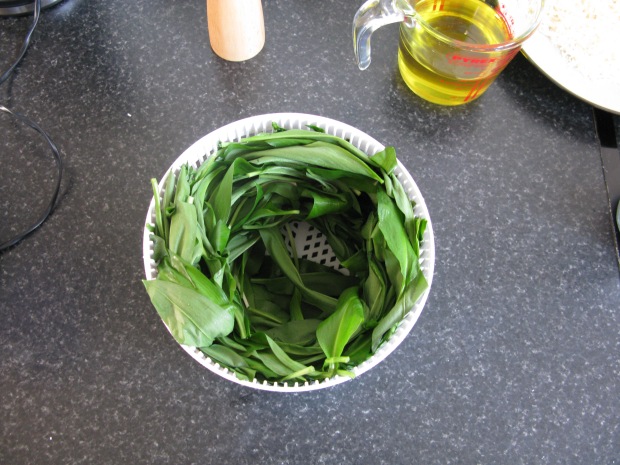
Dry it…

IMG_0359

Put it all in a blender…

IMG_0360

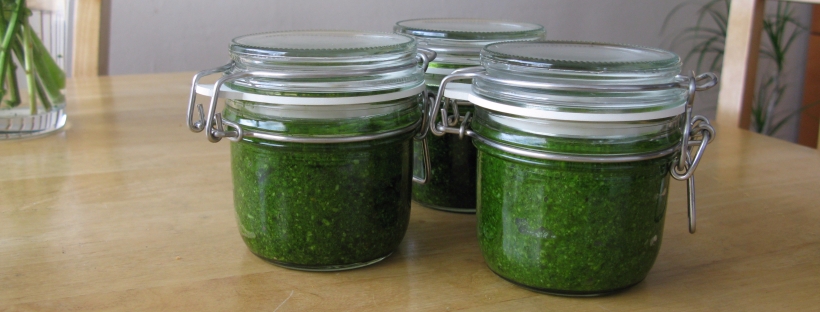
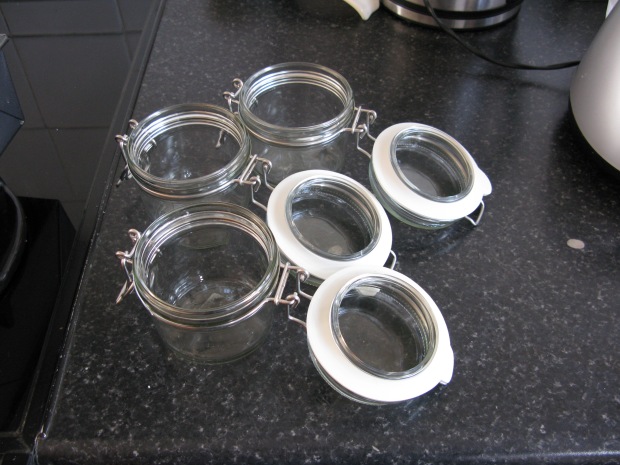
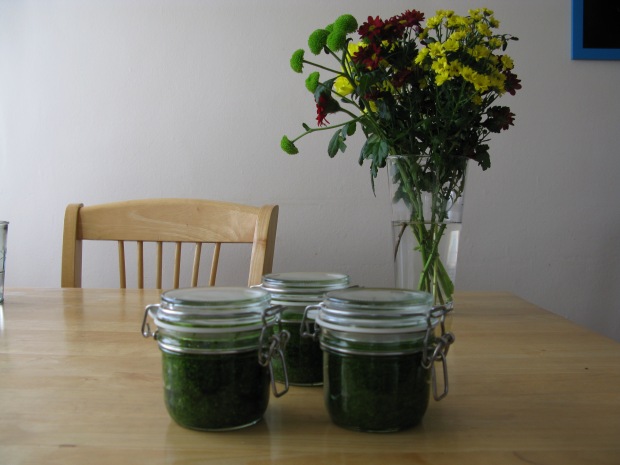
Pour it all in sterilised jars.

The above made about 3 cups of finished product, so you can half it if you prefer. Also, this batch was too much for my blender to handle at once so I made it in two batches.

IMG_0366

And voila…

It lasts in the fridge between one week and one year, apparently. Well, go figure. I’d say if you pour a bit of olive oil on top to recreate the seal, it will last for a good while. There is no chance of that happening to my batch because I like it so much I put it in and on everything. And I mean *everything*…on a piece of bread with cheese or a hard boiled egg, stirred into a creamy veggie soup, on a savoy cabbage roll, on scrambled eggs and mixed with brie and gnocchi or pasta. Let’s just say I may be making another batch soon…as I cannot wait to try out more recipes to use the leaves I found online.

A word of caution to wrap it up though – it is quite a pungent condiment so I advise you to keep a toothbrush closeby…:)


Lisbon Treat

Have you ever blinked twice and two moths were gone? That’s how I feel. It’s March already and a new post is long overdue. So here it is!

One of the most pleasant things to happen so far in 2017 was a recent trip to Lisbon, Portugal. I have to say, going to a sunny place in February while living in Ireland, is a brilliant idea. Even if it’s for a few days, getting away from this cold grey weather  feels luxurious. It also shows that following the advice of ‘less stuff, more experiences’ from my gift guide is totally worth it!

On top of that, I tried to make it a valid sustainable trip and here’s my rundown.

The upsides

Accommodation

Thanks to booking.com I chose an ‘eco’ hotel for our stay. It wasn’t necessarily my preference but it did have the second best customer rating and offered a good deal so why not! Hotel Neya Lisboa market themselves as a sustainable hotel in the heart of Lisbon and they deliver on that promise. Room design using mostly natural light, no single-use toiletries, towel/sheet washing on request only, low-pressure water taps and recycling receptacles in the bin. Very little waste in the breakfast buffet also – almost no single packaging and they claim all unused food is distributed daily to a local charity.  

Transport

Lisbon is very accessible. We were close enough to the city centre, not quite walkable but the public transport system in the capital was clean, frequent and reliable. Despite it being recommended in every single guide, we didn’t take the historical trams, they were pretty cute though! We did take the occasional taxi – lazy Sunday mood and all. But the best part was the bikes hired in the hotel for free. We spent an afternoon exploring the city like pros… (Note: Lisbon is a properly hilly city. Also, there is a fair amount of not-so-cyclable steps in the old city.)

Shopping & Eating

There weren’t many big supermarkets in the area we stayed in but a few small independent shops which were great for getting loose produce, basically any fruit and veg you can think of. They had the basic groceries and even though these were mostly packaged, there were olives and pickled fava beans (I think) to be had and also unpackaged local cheese. They insisted on a plastic bag but I was quicker with my Frusack and used it instead.

We also visited the famous ‘Thieves’ Market’ Feira da Ladra. I can promise you if you were looking for any odd, random and peculiar thing, this is where you would go. Have a look yourself…

There were lots of famous Portugese pastelerias and basically any cafe you go to sells a variety of pastries and cakes – anything a pastry-lover could wish for. I’d love to include some pics but the food was always gone before I could take out the camera!

We had no problem getting tap water in the restaurant. Only once did I get a plastic bottle. In comparison to that, all the juice bottles were made of glass. Lesson learned, juicy refreshments consumed.

One of the highlights of the trip for me was a visit to the local bulk store, Maria Granel. I found it through this handy website. Coming from a city with no package-free shops, I came excited and equipped. I brought a few cotton bags and even some jars as I planned to stock up on spices. Let’s just say that once you become aware of the obscene amount of packaging in a normal shop, walking through all the bulk bins is very soothing. So I stocked up! On lentils, spices and snacks. Because, why not. The lovely girl in the shop kindly helped me with the Portuguese names and also let me take some pictures. Have a look!

The downsides

Travel

Since we live on an island and ferries to the continent take ages and aren’t very cheap, we flew to Portugal. I offset our carbon footprint which cost €6 for both of us. It’s less than a pint each and I felt better.

Refuse system

The one thing I found lacking were the organic waste bins. I loved them in Barcelona and even though I’ve seen glass banks in Lisbon and bins for paper, plastic and metal, there were none for organic waste. I was reluctant to throw out our organic waste (mostly fruit ends) in a general bin. I was going to ask the restaurant staff to put it in their organic bin but somehow I felt they might not bother and it would end up in a general bin anyway. I was probably wrong but I ended up bringing it back home. Yes, I realise I might be slightly weird.

Plastic

The only other ‘downside’ was the constant presence of plastic bags in all shops and kiosks. I really liked the compostable bags we came across in supermarkets in Sicily and would love to see more of them in other countries. Portugal is a coastal country and I am sure they are aware of plastic ocean pollution. Hopefully it’s just a matter of time until they either ban them, tax them or make them biodegradable.

Lisbon from the sea.jpg

All in all, it was a nice couple of  days spent in a country where no one seemed to be too rushed or under stress but instead smiled and enjoyed the life.

IMG_0140