Dandelioney

It’s something I kept hearing about when I was a child but we never actually made it at home. Probably because we lived four doors up from a beekeeper who always supplied us with amazing local honey. I am talking about ‘dandelion honey’, another Spring treat that’s quite satisfying to make!

It’s a very simple, 4-ingredient recipe – water, lemons or oranges, sugar and dandelion flowers.

Recipe

  • 450 dandelion flowers
  • 1.5kg sugar (white or brown)
  • 1 lemon
  • 1 orange
  • 1.5 l water

Step 1 – Collecting

Since it’s best to collect the flowers and steep them without washing (the pollen strengthens the flavour), I picked them early in the morning after a night of rain and before the doggies could get to them. I guess since the extract is boiled afterwards, it’s pretty safe to use them without washing. A little piece of advice: the collected dandelion heads will stain your hands and your bag so use one that can get dirty and perhaps a pair of gloves.

Park meadow

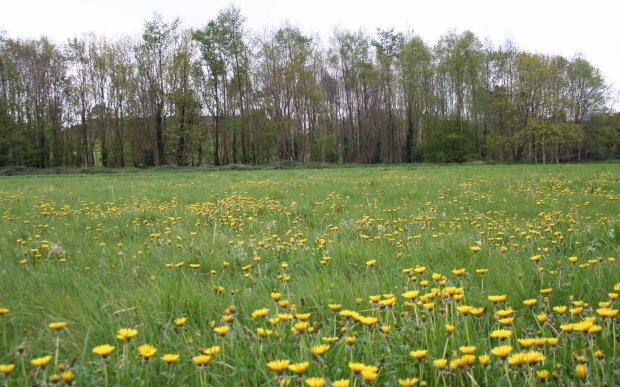
There were enough dandelions for me and the bees…


Collecting

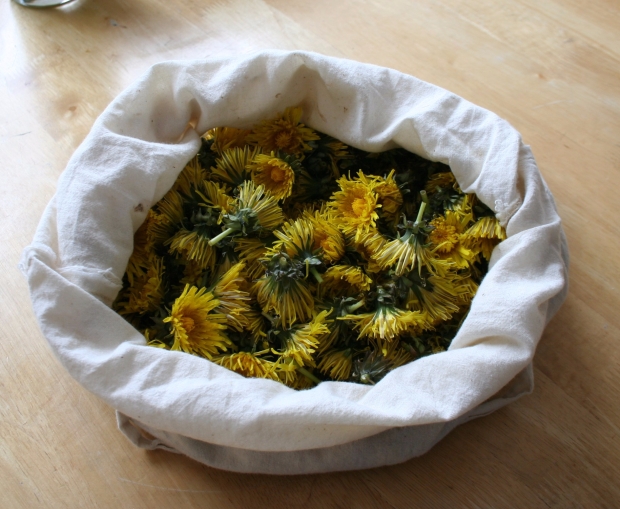
It was about half a bag of dandelion heads…
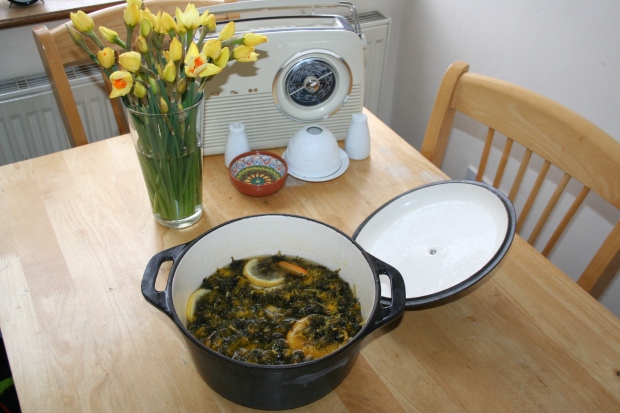
Step 2 – Steeping

Cover the dandelions and sliced lemons/oranges with 1.5l of cold water. Bring to the boil, simmer shortly, turn off the heat and leave to macerate for 24 hours.
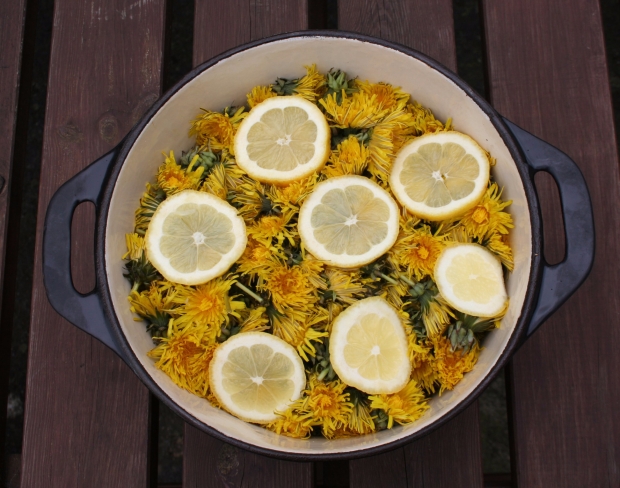
Steeping

A pretty mix

After macerating

After 24 hours…

Step 3 – Cooking

Strain the mixture through a very fine sieve/muslin cloth/nut milk bag/tea towel or whatever you can find and squeeze out all the liquid.
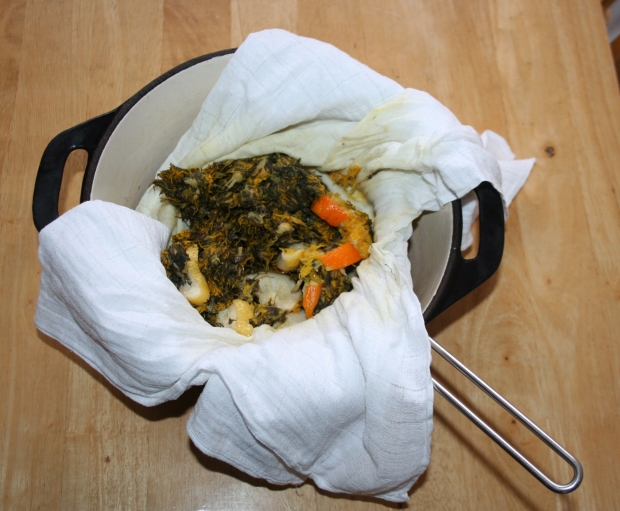
Straining

Squeeeeeze!

Add 1.5kg of sugar and bring to the boil. Simmer uncovered on low heat for about 1.5 hours or more, if you think it’s too watery but the mixture will thicken when cooling so don’t be too stressed!

Cooking

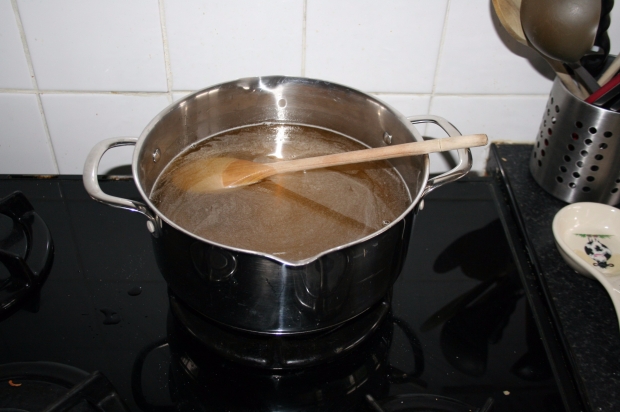
Add sugar and simmer.

Step 4 – Preserving

Prepare the jars by washing in hot water and sterilising them. (Put them in a cold oven and set the temperature to 100C/212 F, when the temperature is reached, leave them in for 15 minutes, then turn off the oven but keep the jars warm until you need them.)

Jars

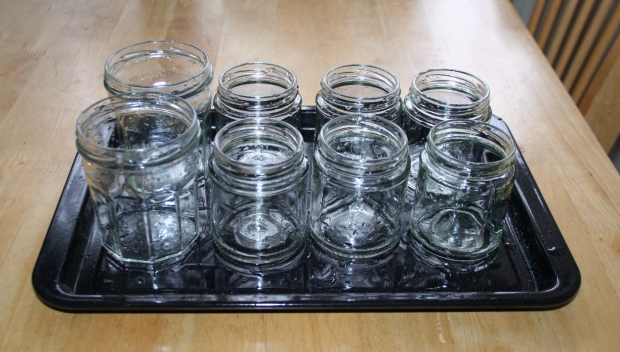
Ready to be sterilised.

The above recipe makes about 1.5l of syrup (5 smaller jars and 2 Bonne Maman jam jars :)).

Pour the syrup into warm jars, close tightly, turn upside down, cover with a blanket or towel and leave to cool. Done!
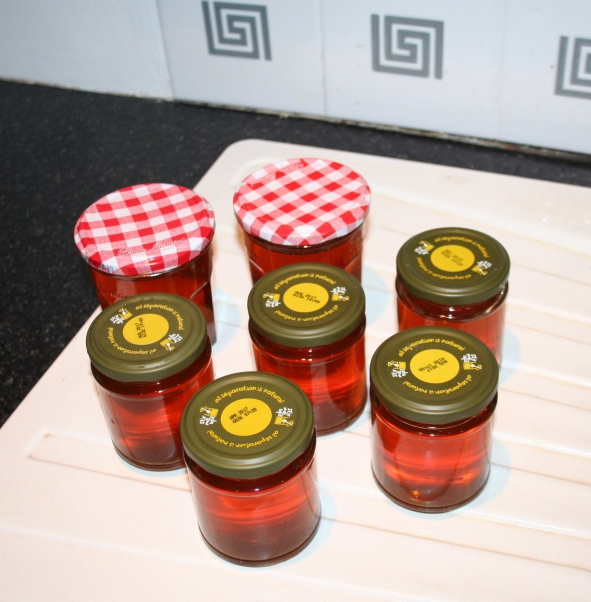
Ready

The colour!

The consistency and colour of the finished product are very much like that of proper honey and even the taste and smell are very similar.

This honey contains significant goodies – trace elements and vitamins such as calcium, magnesium, iron, sodium, phosphorus, silicon, vitamins A, B and C and the antioxidant lutein. Who knew…

Another good thing about this homemade sweetener is that the only waste I created was the paper bag from sugar.

As a bonus, even though I am not an expert, it looks like a valid vegan honey replacement if you happen to be looking for one.

I cannot wait for our Sunday pancakes and putting it to the test in some oaty flapjacks! What would you use it for?

Hallowe’en & Co.

With Hallowe’en around the corner, the ‘holiday season’ is starting. Ireland, and Europe in general, might not be as wild as across the ocean but it does mark the beginning of the consumerism season. Hallowe’en, Thanksgiving, Black Friday, Cyber Monday, Christmas, New Year’s Eve and New Year’s Day. Many of these festive days lost their original meaning (or were artificially created) and became an excuse to buy. Buy and consume more and more stuff. It’s a matter of choice though!

Take Hallowe’en, for example. Did you know that the practices of Hallowe’en mostly come from Celtic paganism in the British Isles, and the feast of Samhain, the new year? They believed it was the time when ghosts and spirits came out to haunt and the Celts would appease the spirits by giving them treats. The feast was celebrated in Ireland, Scotland, Wales and parts of Britain.

In Slovakia, until some years ago when the American version of this holiday wrestled its way in, this time of year was solely dedicated to remembering those who left us with November 1st  being All Saints Day and with All Souls’ Day the following day. Instead of scary costumes and parties, people went to cemeteries to light a candle for their dearly departed. It was (and I hope still is) a time for family visits, crisp evenings walks on beautifully lit graveyards with a quiet atmosphere of self-reflection.

dusickovy-cintorin

Candle-lit cemetery in Slovakia (source: Dnes24.sk)

The Slovakian take on things and also not having small children makes me slightly oblivious to the commercial part of Hallowe’en. I prefer the ‘autumnal-harvest-following’ atmosphere of this time of the year and preparing oneself for winter.

Since there is also a 3-day weekend around Hallowe’en in Ireland, we are often not at home for the day but if we are, I prefer to keep it low-key and low-waste. Here are my few tips you might find useful.

Decorations

  • Reuse the ones from last year or the year before, I guarantee you they will be still perfectly fine (I mean, if you stored them well) and nobody will notice the repetition. No need to buy more plasticky junk than we already have.
  • Go natural. Carve the pumpkin (roast the seeds, make a pie from the flesh and compost the jack-o after the holiday), put small decorative pumpkins on your window sill and eat them after Hallowe’en, use colourful leaves, acorns and chestnuts as a table decoration. Let your mind loose and use everyday objects to make decorations.
  • Make seasonal decorations with your kids – you spent some quality time together and won’t need to queue to pay in the supermarket for the unimaginative ‘Made in China’ junk.
OLYMPUS DIGITAL CAMERA

Go natural with decorations…(Source: pexels.com)

Costumes

  • Rent rather than buy if you have to.
  • Better still, make your own. Last year, we were invited to accompany my boyfriend’s nephews for their trick-and-treating at the last minute. I put together a costume which wasn’t bad – perhaps not the most exciting one but did the job – a pirate! A stripy t-shirt, tracksuit bottoms, a scarf, bandana, homemade eyepatch and a borrowed foam sabre (or you can easily make one from cardboard) – add a bit of ‘arrgh’ and there you are!
  • You could also be a ninja – black pants, black t-shirt with a black dressing gown back to front, a face mask made from another black t-shirt and you’re all set.
  • Or, if you have a little bit more time and some leftover white paint, you can always try to create a skeleton costume – just paint the bones onto a black t-shirt and leggings. Or, if you want to use up a t-shirt one more time before cutting it to rags, cut out the ‘bones’ and wear an opposite colour t-shirt underneath (black on white or white on black).
  • Homemade costumes are fun, original and can be totally zero waste…Internet is a great place to look for some inspiration!

Treats

  • This is a tougher one. You can be the unpopular lady/guy who offers some easy peelers or other fruit but since we all know that (almost all) kids really want the sweet stuff, you might want to skip this one.
  • You could also try some homemade cookies, buns or other bite-size treats but unless you know your neighbours, well, these might end up in the bin regardless.
  • One more option that might work is to get small glass jars (from yogurts) and fill them with nuts and chocolate/yogurt-covered raisins or sweets bought in bulk (in the cinema or the Pick&Mix section in Tesco for example).
  • If you think these will still raise suspicion, you might need to give up and buy conventional wrapped candy. If so, go for the biggest bag available!

But hey, if you still think that Hallowe’en will just create unnecessary waste and belly aches from all the sweets, there is always an option to skip it completely. Go somewhere nice for the weekend, go for an adventure or just turn off the lights, unhook the bell, make some popcorn and watch telly. And don’t mind the Grinch comments, it’s not like you’re missing your only chance to take part – it will all happen again next year – and every year for the rest of your life! 🙂

Ups and downs

Switching to a simpler life came with one added bonus – I can engage my creative skills in making things myself. Being made from simple ingredients, they are better for me – and I get the satisfaction of making something with my own paws.

However, as with everything, there are successes and failures. I want to share my experience with homemade potions to encourage you to try something new (and not be discouraged if something doesn’t work)!!

Laundry

As mentioned in my last post, a homemade laundry gel is not only very easy to make but also much cheaper in comparison to store-bought products. I gave it a chance after an experiment with soap nuts which did not work for me at all. I bought a kilo of them when I started looking for an alternative to conventional laundry products. I closely followed the instructions on the nice textile bag. All was well until after a full 40 degree cycle, the clothes came out just simply wet. No feel or smell of cleanliness or freshness. I also probably didn’t fasten the little bag with the nuts properly so they ended up spread all over the wash. I was not impressed! Quickly after this, I decided to look elsewhere. In true zero waste fashion, I thought I would use the nuts for some second-degree laundry (rugs, mats, etc.) but never actually came around to do that. So, if anyone wants to give them a chance, I will happily send them my bag for free!! Maybe you can have better results than me. (Conclusion: Laundry gel – YES, soap nuts – NO)

20160614_203707

Soap nuts vs laundry gel…


Kitchen

20160614_203408

Buying in bulk 🙂

As we have a dishwasher, I searched for a recipe for homemade dishwasher tablets. After some internet research and entering the world of opinions on Borax I, luckily, found a recipe that consisted of washing soda (soda crystals), baking soda, salt and citric acid. Simple enough ingredients and simple enough instructions. Basically, mix it all together. Well…. The first batch was great. Consistency was fine, cleaning power decent as well. So I went ahead and bought a bulk pack (a 5kg tub) of citric acid. Hmm. Perhaps a slightly rushed decision. Every batch after the first one just didn’t cut it. The mixture either turned to liquid (this apparently happens in humid conditions – Ireland, duh!), turned to stone (citric acid reacting with the sodas apparently) or didn’t really wash the dishes properly (when the citric acid was added right before the wash). So, after a few trials and errors, I reluctantly went back to shop-bought tablets. I chose the Ecover brand which is supposed to be not damaging to the environment but every tablet is still wrapped in plastic. Not ideal. However, I haven’t given up on this one yet. Especially when looking at that full citric acid tub 🙂 I will try again. Perhaps the drier summer climate will help the result. (Conclusion: Dishwasher tables – MAYBE)

One more nature-friendly swap for your dishes is to change the shop-bought rinse for vinegar. I tried out red wine, white wine, malt and apple cider vinegars. They all worked perfectly and are all cheaper than the original rinse. (Conclusion: Vinegar rinse – YES)

Personal hygiene

I am not a big fan of mouthwash but here and there I like to use it. I don’t like, however, the alcohol-laden Listerine and similar products, so I searched for a natural one. The internet proved to be full of ideas and recipes which were pretty easy with simple and easily found ingredients. I followed the recipe from DIY Natural. Water, baking soda, a few drops of essential oil and you’re done. You can add some xylitol if you don’t like the salty taste of baking soda 🙂 [Recipe I use: Mix together 1/2 cup filtered water, 2 tsp baking soda, 1 tsp xylitol, 2 drops of tea tree oil, 4 drops of peppermint oil]. You might need to mix the concoction more often than you buy a bottle of Listerine (big batches are not really wanted as the oils blend and the mouthwash changes taste slightly) but it literally takes 2 minutes and I am fine with that. (Conclusion: Mouthwash – YES)

20160614_204222

Some time back, I came across an article on Treehugger about natural body scrubs and said to myself that I am going to try them out! I picked the last one with sea salt and oil. I used some sea salt that I bought in bulk (well, bulk-ish – a 2kg tub), olive oil from the kitchen and added some dried lavender from my garden. I mixed everything in a nice little Kilner jar and put it in the bathroom. But, boy oh boy, what a mess trying to use it! Maybe I am just fussy but it just didn’t work for me. The oil was everywhere and most of it was soaked in my towel rather than by my body. Not to mention the bathtub was all oily and slippery after use. I suppose if you use very hot water for your shower (which I don’t), it wouldn’t be as bad. Either way, I was happy when I finally finished the jar. I still like a good scrub though so might try the dry one – no added oil – less mess guaranteed. (Conclusion: Oil scrub – NO).

At the local market, a girl was selling homemade cosmetic products and I was curious to try her natural clay toothpaste. I tried it twice. The second time just to reassure myself that this is not for me. I am not sure if it was the weird texture or the extra salty taste. Simply put, it was just yuck. But then again, that’s just me – my friend used it and loved it!! I happily traded her Waleda toothpaste for my clay one. Until I find something else acceptable to brush my teeth with (pure baking soda sounds like a very unlikely candidate for me), I will keep using the Kingfisher natural toothpaste. Smooth and refreshing. I like. (Conclusion: Clay toothpaste – NO)

Cleaning

If you haven’t tried it yet, the internet-praised cleaning power of baking soda and vinegar is, in fact, true. I was a bit sceptical at the beginning as it did seem a bit odd just to scrub the bathroom with some white powder and spray what is basically a sour water but it does work. The child in me also loves the fizzing when you mix those two together 🙂 There are dozens of uses for this combo but I mostly use them to get the bathroom to a spotless condition. Including that pesky black mould that is an organic part of an (c)old house in a humid country. (Conclusion: soda and vinegar – YES)

There are many more but these are just a few examples of fun stuff you can try to make yourself ! Homemade soaps, lotions, shampoos…all you need is an open mind and maybe a bit of patience 🙂


Green Whites

One of the things that I like about Zero Waste is the fact that I save money. Money that can be spent on going out, meeting with friends, trying out new fun stuff. So when I learned I can replace the commercial laundry detergent with something simple for a fraction of the price, I was sold on it pretty quickly.

All I needed to swap all the chemicals usually found in laundry products for something greener were two things – a bar soap and washing soda – and a bit of time to mix them together. I found this laundry detergent recipe in the Bea Johnson’s book and adapted it a bit.

You might be sceptical if this easy solution works but I’ve been using it now for a couple of months and I am very happy with the results!

What you need

Bar of soap – recipes in cyberspace ask for all kinds of different soaps but your basic castile soap bar, laundry soap or any natural soap bar will do. Bea recommends using the blue one which contains optical brighteners. I bought mine in Slovakia last time I visited but I am sure you can find it anywhere 🙂 Dr. Bronner makes soap bars that should be fit for the purpose!

Washing soda – or soda ash – usually sold in supermarkets in the laundry aisle. It took a little bit of internet research to find out that in Ireland I need to look for soda crystals! I found one kilogram bags being sold in Tesco – the bags are still made of plastic film which is not recyclable but at least the pack lasts some time.

20160530_191057_20160602220017493

The last ingredient is just warm water. Other than that a few utensils will come handy – a basin or a bucket for mixing, a measuring jug, a measuring cup and a mixing spoon. Depending on the method you use, you might need a hand blender to liquidise it.

How to make it

For a 3-litre (about 3 quarts) dose, you will need a ½ cup of washing soda and a ½ cup of soap. Measure up the washing soda and pour it in the basin. Grate the soap (I use a conventional cheese grater) and add to the basin. Mix them together a little.

pixlr_20160602201315825_20160602205353995

Pour in about 0.5 litres of hot water (about half a quart). I use boiled water to start the mixing. Stir until the soap and soda are mostly dissolved. Add another litre of hot water. I then pour in 1.5 litres of cold water to bring the temperature to lukewarm. Stir the mixture for a little while and leave it to settle, best overnight. In the morning, when the liquid has turned into a wobbly jelly, enjoy this chemistry magic for a while and then break it with the mixing spoon. To bring it back to liquid form (it will be nicely thick), use a hand blender for a couple of minutes. If you used an unscented soap and you would like to add some scent, you can now add a few drops of any essential (not synthetic) oil – lavender, citrus or tea tree work well.

I asked my lovely boyfriend to film this part of the preparation process – please be kind with your comments 🙂

Pour the finished product into a prepared jug (I use a 3l plastic milk jug) and voila, your laundry gel is ready to use.

If you don’t have a hand blender or you want to skip this step, you can pour the warm mixture straight into the jug you are going to use to store the product and leave it to cool in there. Just make sure you shake it a couple of times in the next few hours to ensure all the ingredients are mixed properly. I found that with this method, the gel is more likely to separate when not used for a while but then just shake the bottle and you’re good to go.

20160531_221108

How to use it

I usually use about a cup (250ml) per load, adjusted for the amount of clothes and level of dirtiness 🙂 One 3l dose lasts me for about 13 washes. With 3 washes per week on average (darks, lights and towels for 2 people), I have enough for a month to 5 weeks. The recipe is very easily doubled or tripled if you want to make more, so no need to skimp!

I normally pour the gel into the detergent compartment in the washing machine but I don’t see why you couldn’t put it directly in the drum.

How much it costs

I mentioned in the video that this laundry gel costs about 10 times less than a conventional gel. These are my calculations:

Expenses:

300g laundry soap €1.501kg soda crystals €1.39

For 3l of the gel I need 60g of the soap (one pack lasts for 5 doses or 15 litres of gel) and about 90g of the soda (for 15 litres I use half a pack for €0.70).

In total, 15 litres of the gel costs €2.20. That is €2.20 for 65 washes (5 x 3l dose x 13 washes per dose).

A comparable conventional laundry detergent (let’s say Persil Small & Mighty Non-Bio 60 washes) costs €19.80 – which is 9x more. On offer, Ariel Bio Washing Liquid 60 washes costs €10.00 which is still 5x more than my non-toxic and totally working laundry gel.

The prices might vary where you live but I guarantee you that you can save money (not to mention all the chemicals which will not get into the waterways from the washing machine).

Final notes

My friend also uses this recipe because she and her daughter have very sensitive skin and conventional laundry products are quite irritating for them. So, that’s another brownie point for the homemade stuff.

Finally, if you’re asking about fabric softener that would be natural and eco-friendly, think  vinegar. Apple cider vinegar and white distilled vinegar work well for me.  About a ¼ – ½ cup (60 – 120 ml) with a few drops of essential oil of your choice (I like grapefruit or tea tree) will give the clothes nice smell and touch.

Well…are you tempted to give it a try yet?