A day in the life of an aspirational zero-waster

I wake up in the morning and shuffle to the bathroom to brush my teeth and wash my face. While squirting my ‘compromise’ toothpaste (it’s all natural but it’s still in a plastic tube) on my bamboo toothbrush I consider if I’m maybe ready to try that homemade toothpaste with coconut oil. Well, the last one I bought at a farmers’ market had bentonite clay in it which is really just ‘white mud’. Let’s just say that didn’t work.

I put on my cycling gear and head to the fridge to take out the food for the day prepared last night. Overnight oats, some leftovers for lunch, another jar with snacks – nuts, seeds and dried banana chips I managed to buy in bulk. Sometimes, when I’m packing the salad, the thought of that jar weighing possibly twice as much as those leaves crosses my mind, but it’s quickly followed by the ‘more exercise for me so’ thought.

After-work jars...

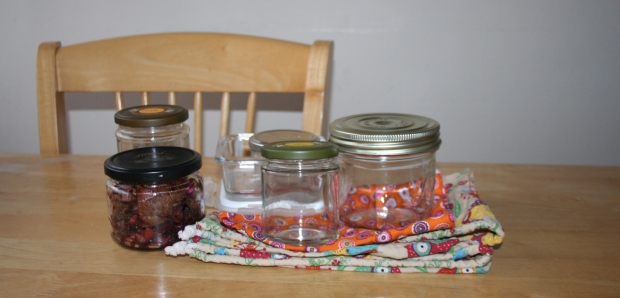
My daily jars 🙂 – including the Friday’s ‘used loose tea for compost’ jar

I kiss my other half goodbye and hop on the bike. As I am approaching the cars stuck in the bottleneck leading to the city centre, I am silently judging them from my high-horse, ehm, saddle…as they sit in their gas-guzzling pollution-puffing machines. I smile at my efficiency but frown at all the smoke I have to sniff in order to be green. Go cyclists!

I take a shower (which could be shorter but the hot water feels so gooood), innerly praising my employer for providing the facilities. As I am using my shampoo bar on my hair I’m thinking about the possibility of going no-(sham)poo or just water washing. But then again, could I handle smelling like vinaigrette? I put on the store-bought deodorant which I can’t wait to use up because I want to have a go at the homemade stuff. A mental note creeps in: get arrowroot powder for the recipe.

Fresh as a daisy after the morning workout (streamlining does work – commuting on the bike means no need to go the boring gym – yay!), I make myself a cup of tea. I’m feeling smug praising my decision to stop drinking coffee all those years ago. It was long before ZW and it started as an experiment but it seems to have taken hold. The tea is loose, a great maté blend from the tea shop where you can fill your own tin. It’s funny how it’s easier to get luxury items without packaging, like tea and nuts, but looking for a few lentils in bulk can be a nightmare. I wish there was a proper bulk shop around but I’m happy with the bulk options I found so far (and they seem to be growing!). After steeping the tea, I put the leaves into a jar and I explain to my curious colleague that at the end of the week, I bring the jar home to empty it in my compost bin. I wish my company had compost bins. They’re doing well to have recycling bins in, it’s a start. Perhaps, if I put my mind to it, I can make them change theirs.

As the days continues, I go about my work. From time to time I think how great it would be to work for a properly green company, one that works in the sustainability industry. Immediately afterwards I think that working on my own green venture would be even better. One can dream. Or plan 🙂 While snacking on my nuts from a jar, I occasionally check the local Zero Waste Facebook page. Sometimes I comment and think back about the beginnings of my ZW journey…how much I learned and how much I changed my habits since! Figuring out what worked and what didn’t was the fun part! And it still is.

For lunch, I have my no-food-waste-in-my-house leftover provision. After I’m finished, I casually check the canteen’s general  bin for any recyclables. Most of the days, there are some. As I’m washing them, I think about what would make others actually give a crap and at least recycle. Then I think back to those days when I had a ready-made salad packed in a plastic bowl for lunch, a plastic bottle of orange juice and a packet of crisps or a Kit-Kat for mine. Thankfully, those days are gone. I put the recyclables where they belong and think that if there was a deposit system for plastic bottles, it would be much easier to get people to change. I just can’t grasp how all the plastic bottles get used for about 30 minutes and then get dumped. Sigh.

After lunch, rain or shine, a short walk is in order to clear the head and get some (reasonably) fresh air. I walk along the canal and pass a lunch food market with lovely smells from all the different  kitchens. Instead of looking at their menus, however, I look around at the amount of polystyrene trays and plastic cutlery left behind. They are in a bin in the best case, near the bin or, in the worst case, on the footpath. For about the fifth time that day, I cannot help thinking if my own ZW efforts can change anything. All the plastic I avoid and all the rubbish I don’t throw away will still be created somewhere. I feel a bit down but then I realise it doesn’t matter what other people are doing right now. As long as I keep doing my bit, there is a chance I can spread my way of thinking. Then I remember that activism is the best way to change things so I decide that I will send a message to the market organisers to see if they could maybe provide more bins or compostable food containers. Or, even better, to encourage customers to bring their own lunchboxes. Bit by bit, starfish by starfish.  

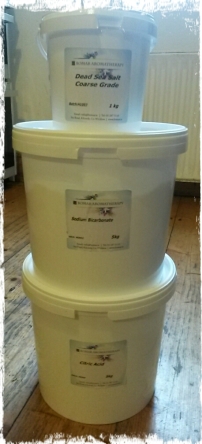
I finish up my work, gather all the empty jars from the day and rattling like a bottle bank I hop on my bike. As I am cycling and thinking what culinary marvel I will try to create for dinner (the veggie box arrived yesterday so I have lots of fresh produce to play with), I make a list in my head of things to do…water the raised bed with some semi-decent gardening attempts, change the beer traps for slugs who love the aforementioned attempts, buy some baking soda, trying to find that Redecker dish brush online and find out who could crochet some dishcloths for me…I am flying on the bike (reasonably restricted by the jars’ clanking) but have to, yet again, stop behind a puffing bus at the lights. Ah well, ups and downs, ups and downs.

It’s strange to think that just a couple of years back, none of these thoughts crossed my mind in an average day. I guess this is what happens when you find a cause that you really want to get behind. But I do sometimes wish I didn’t have to think about these things so much and living sustainably was the norm. Until then, I’ll happily do it all again tomorrow.

Dandelioney

It’s something I kept hearing about when I was a child but we never actually made it at home. Probably because we lived four doors up from a beekeeper who always supplied us with amazing local honey. I am talking about ‘dandelion honey’, another Spring treat that’s quite satisfying to make!

It’s a very simple, 4-ingredient recipe – water, lemons or oranges, sugar and dandelion flowers.

Recipe

  • 450 dandelion flowers
  • 1.5kg sugar (white or brown)
  • 1 lemon
  • 1 orange
  • 1.5 l water

Step 1 – Collecting

Since it’s best to collect the flowers and steep them without washing (the pollen strengthens the flavour), I picked them early in the morning after a night of rain and before the doggies could get to them. I guess since the extract is boiled afterwards, it’s pretty safe to use them without washing. A little piece of advice: the collected dandelion heads will stain your hands and your bag so use one that can get dirty and perhaps a pair of gloves.

Park meadow

There were enough dandelions for me and the bees…


Collecting

It was about half a bag of dandelion heads…

Step 2 – Steeping

Cover the dandelions and sliced lemons/oranges with 1.5l of cold water. Bring to the boil, simmer shortly, turn off the heat and leave to macerate for 24 hours.

Steeping

A pretty mix

After macerating

After 24 hours…

Step 3 – Cooking

Strain the mixture through a very fine sieve/muslin cloth/nut milk bag/tea towel or whatever you can find and squeeze out all the liquid.

Straining

Squeeeeeze!

Add 1.5kg of sugar and bring to the boil. Simmer uncovered on low heat for about 1.5 hours or more, if you think it’s too watery but the mixture will thicken when cooling so don’t be too stressed!

Cooking

Add sugar and simmer.

Step 4 – Preserving

Prepare the jars by washing in hot water and sterilising them. (Put them in a cold oven and set the temperature to 100C/212 F, when the temperature is reached, leave them in for 15 minutes, then turn off the oven but keep the jars warm until you need them.)

Jars

Ready to be sterilised.

The above recipe makes about 1.5l of syrup (5 smaller jars and 2 Bonne Maman jam jars :)).

Pour the syrup into warm jars, close tightly, turn upside down, cover with a blanket or towel and leave to cool. Done!

Ready

The colour!

The consistency and colour of the finished product are very much like that of proper honey and even the taste and smell are very similar.

This honey contains significant goodies – trace elements and vitamins such as calcium, magnesium, iron, sodium, phosphorus, silicon, vitamins A, B and C and the antioxidant lutein. Who knew…

Another good thing about this homemade sweetener is that the only waste I created was the paper bag from sugar.

As a bonus, even though I am not an expert, it looks like a valid vegan honey replacement if you happen to be looking for one.

I cannot wait for our Sunday pancakes and putting it to the test in some oaty flapjacks! What would you use it for?

Zero Waste Week!

Originally, I planned to share with you my first attempt at a zero-waste-festival-trip. But, since this week is International Zero Waste Week, this of course takes preference 🙂

zero-waste-weekcampaign-13

What is it?

It is a campaign raising awareness of the environmental impact of waste and empowering participants to reduce waste. It was launched in 2008 and the campaign is conducted almost exclusively online via their website, newsletters and social media. Like with Plastic-Free July, the idea quickly spread from its origins in the UK across the world. It might not be as strong as PFJ yet but it’s definitely an international affair! Anybody can join, doesn’t matter if it’s an individual, community group, company or school – the more the merrier! If you fancy it, you can still do it on zerowasteweek.co.uk.

Themed effort

Every year there is a theme for Zero Waste Week. This year it’s “Use it up!”, focussing on food waste. If you partake, you get a daily email with lots of tips and tricks on how to minimise food waste and be creative with your leftovers, ehm, I mean, future ingredients 🙂 So far, the spotlight has been on salad, bananas, bread and cucumbers – the most wasted foods in Britain according to the ZWW survey.

Their website is full of easy ideas and delicious recipes for tackling food waste. Check them all out here.

My top 3

Buy the right amount

This specifically applies to fresh produce like fruit and veg. The cauliflower or broccoli looks so tempting at the farmers market stall but if I don’t have a specific plan, it might end up sad in the compost bin after lurking in the fridge for about 2 weeks. Even if I do have a specific plan for this or that, something comes up (usually dining out – yay!) and I have to abandon my plan. But I still try my best to use it all up – usually disguised in a curry or stew where the wonky veg is suitably perfect. 

img_20160906_220119

Wonky veg cauliflower curry!

Shop in your cupboards/freezer

I make a lot of food from scratch and I always make bigger amounts to save time. Thankfully, we don’t mind eating the same thing three days in a row 🙂 Sometimes though, I freeze half of the food ‘for emergencies’, which are usually office lunches or hangover days… I often cook pancakes (Sunday brunch essentials) and freeze half of batch so the next time it’s a quick and tasty meal with no mess. Or naan bread. Or lasagne. Or pies. I think you can freeze pretty much any cooked (or assembled ready to be cooked) food, more than the obvious soups and stews. If you are using a recipe, it often says something about its suitability for freezing. So, if  you have a freezer full of goodies, don’t store them there for a year, take an evening off and declare an emergency 🙂 

img_20160907_215343

Japanese night anyone?

Cupboards are a funny thing. Even if large and spacious, they have hidden corners where you can find some real, ehm, treasures? The Zero Waste Week campaign prompted me to do yet another audit of what’s in mine and what could/should be used up. The highlights were a sushi making set (including brand new unopened bamboo sushi rolling mats), a can of okra, a sad half-bag of short-grain brown rice and a tub of malt drink bought (in pre-ZW days) for a Jamie Oliver recipe which I made. Once. Oh and about 6 tins of various granulated Indian  teas. I thought I was better than this.


img_20160908_213851

Tea-drinking season is approaching…


Even though some of the above offenders might have passed their ‘due date’, I often think that these are, especially in case of dry or canned goods, very safe estimates. When stored properly (no sunlight, extreme temperatures or bugs), they are fine even after a good while. So, my pledge is to use it all up leaving the cupboards in a better shape than I found them. 

Plan your meals

I consider myself to be quite organised but not to the point of having a meal plan ready on Sunday evening for the week ahead. After all, there are only 2 people in our household so it’s not completely necessary.

I do, however, like to think a bit ahead about what we’re gonna eat so that I can minimise my shopping trips. One trip on Saturday usually does the trick with maybe one or two stops for the perishable items during the week. On Saturday though, before going to the shop, I have a good look in the fridge/pantry to see if there is anything that needs to be used up and included in the meal prep 🙂

There are days though when I just don’t have the time to plan (we all do!) so I always keep eggs in my pantry as an omelette is my go-to meal! Quick, easy, versatile. Done.


If you think about it, wasting food is wasting money. Unless you’re super rich and don’t care, you don’t like wasting money. According to research, the average householder wastes €40 of food per month which could be, if you ask me, spent on other fun things!

It doesn’t take a rocket scientist to be clever about the food one eats. As always, apply common sense. Don’t buy what you cannot use in time and use up everything before you go to buy some more!

Here’s to the Zero Waste Week 2016!

Zero Waste House Move…

The best way to move towards a Zero Waste life is literally ‘to move’. Ideally, to a much smaller house than your present one. But in my opinion, unless you live in a tent, I don’t think a ZW house move is possible. Maybe, just maybe, if you already are a hardcore zero waster, you can do it. The rest of us, unfortunately, will definitely face some unplanned rubbish.

A good thing about this is that moving house is an amazing opportunity to think about, see and physically become aware of all your possessions (and I mean ALL). This leads to a natural second step – reducing them!

It’s seeing all the stuff that you have somehow collected over all the years of your adult life stuffed into numerous boxes, crates and bags that does it. The sheer fact that you have to transport them from one place to another makes you wish you had so much less.

In my case, we moved about a year into my ZW journey which helped because a good portion of my stuff was already donated, given away to friends or repurposed. To my surprise though, I still own a lot.

movingboxes

Not proud of this much…

It’s up to you to decide what’s ‘a lot’ and ‘enough’. Lindsay from treadingmyownpath.com said it perfectly: “Minimalism, decluttering and finding our “enough” has nothing to do with going without, or holding back. It is about finding our “enough”.”

For each of us, this means something different. In some people’s eyes, I have a lot of glass jars. But, they are essential for me and I use them a lot. My boyfriend has a lot of books and they are essential for him. In comparison to other people, we might not have enough clothes or not enough bottles in the bathroom. We have a good range of gardening equipment but no TV. It’s all about personal preferences.

Sorting

When you know what’s important for you and what is not, start sorting. I am not gonna lie, this is a tedious and time-consuming job. You have to go through all your things in a true KonMari fashion and question the effect on your life of every single thing you own. Yes, it might take aaages. But, if you can do it, you will be rewarded with a clutter-free home.

Changing hands

You hit another dilemma – on one hand, you do want to reduce the amount of stuff you own but on the other, you don’t want to create waste!? It’s not sustainable to throw things out just to own less!

So, once you have your ‘give away’ pile ready, start looking in your social circle. Family, friends, colleagues, neighbours. Functional things in good order might just find a new home…the Star Wars cushions, random kitchen accessories you never used and three sets of placemats….they all have hope.

Use the power of internet – post an ad online on local sites (Donedeal.ie and Adverts.ie are a godsend!). If you have brand new things that don’t fit, duplicate items or decent working electronics, they might even generate a little bit of cash!

teddybears

Teddies that found their new home…:)

I had a bunch of teddy bears that made their way into my home one by one but weren’t happy as nobody played with them. With a little bit of time spent internet exploring, I found a teddy bear hospital who took them and they will be a part of an annual charity event for to help people with MS. I was really happy with that I can tell you!!

Ask in your local charity shop what type of things they accept (the answer in my case was: pretty much anything except furniture) and bring the rest there.

Back in the cycle

If you have items that didn’t make it into any of the above categories, see if you can reuse them (old clothes as rugs, old pillowcases to be sewn into produce bags, etc.).

It’s inevitable though that you still end up with some stuff, hopefully suitable for the recycling bank – small electronics and broken cables, broken glass – and for the curbside recycling – the takeout containers from when you were too tired to cook and all the jars were still boxed up :).

Last resort

After all this (and I did do my best), we still created waste – from broken things that were, let’s be honest, never going to be repaired, things that were just not suitable for a charity shop or a second hand exchange (worn shoes, etc.), things and materials that couldn’t be recycled because they were too small, plastic wrap, dust bunnies (or rather elephants), it all piled up. I am dedicated to Zero Waste but there was a line between it and retaining my sanity by making the move as quick and smooth as possible. The compromises!

The good news is, we did manage to avoid some of the usual wastefulness associated with moving. I got the packing boxes second-hand from a shopping centre and will try to pass them on to someone in need (internet should take care of this). All the cleaning that had to be done in the house was successfully completed with the well-known combo of vinegar and baking soda, no bleach or other nasties needed. We organised the stuff properly to minimise the car runs (ok, more or less…).

Lessons learned

What did I learn for the next time?

  1. Organise the stuff you’re moving properly – content of boxes clearly marked, screws of disassembled furniture securely stored!, etc. – it will save you a lot of time when unpacking.
  2. Deep cleaning your new house will make you feel instantly better. Especially when you only need 2 ingredients and hot water. Don’t forget the appliances – your washing machine, fan extract and dishwasher will thank you.
  3. Opt for paperless billing and opt out of promotional emails when first contacting your new energy providers – it will cut the junk mail. Speaking of which, get a ‘No Junk Mail’ sign for the door if there isn’t one yet!
  4. Be ruthless with your possessions – find a new home for anything you haven’t used in a year. Seriously.
  5. Make new friends – find a charity shop in your new neighbourhood and talk to the butcher showing him your glass jar 🙂
  6. Don’t get too upset when you create waste, moving itself is stressful enough. Do your best and bin the rest.

Don’t forget, a new house is a new start, so it’s onward and upward now!

Drink up!

If you are living in the Northern hemisphere you have just experienced the summer solstice a few days back which means the summer is officially here. For the lucky ones who live in southern climates, you‘ve been enjoying high temperatures for what, about two months now? For us, living in countries with very schizophrenic whether, we can only hope that the 20+ degree days are still to come. Either way – forgive me now, all you Irish and Brits – it’s time to swap your cup of tea for something more refreshing to keep you hydrated!

Early Summer is a great time for harvesting some of nature’s reserves and making the most of them. Elderflower is one of my personal favourites. From late May to early July, you can pick the white flowers full of yellow pollen and with a beautiful aroma. There is an abundance of recipes to use them with. The timeless classic which keeps the summer flavour for the longest is a cordial. ‘Bazovy sirup’ (in Slovak) or elderflower cordial is easy to make and very rewarding to use.

I started experimenting with it last year when I realised that we had an elderflower tree (or rather a big bush) growing in our back yard. The internet provides countless recipes and variations of this syrup so you can pick and choose which one suits best. Usually you will need: elderflower heads, sugar, lemons, citric acid and water. Combinations of all of the above depend on how strong/sweet/durable you want your final product to be.

Methods of preparation vary too – you can make it raw or cook it and treat it like a preserve (by water-boiling it after it’s canned). I have chosen the middle ground – cooking it for durability but without the subsequent bottle boiling. This year, I followed a recipe that seemed to work the best and here it is…

Elderflower cordial

Ingredients
30 big elderflower heads
60g citric acid
2.5kg sugar
2 lemons
3 litre water

Start by boiling 2 litres of water and leaving it to cool.

Prepare your bottles/jars by washing them in hot soapy water, rinse properly  and place in a cold oven which is then turned to about 100℃, so they heat up gradually and all the water dries out. If you are using the spring cap bottles, make sure that the caps can take heat – I made a boo-boo and one of my caps melted on me. (Lesson learned!)

Tip: If you don’t have suitable bottles already, buy some French lemonade (or other drinks you can find) in bottles you like. These are often cheaper than special preserving bottles and work as well! Also, their caps can stand the sterilisation process in the oven 🙂  

Pick the elderflower heads. Since it’s the pollen that brings the flavour, try to pick them on a sunny day and not straight after rain. Don’t wash them, just get rid of any little bugs by slightly tossing them. Remove the thick stalks and place in a big enough pot or any container you can find.

Elderflower heads

Collected elderflower heads…

Slice the lemons and squeeze the juice out of them before placing them in the pot. (If you can’t get unwaxed lemons, place them for about 10 minutes in lukewarm water mixed with some vinegar which will get rid of the nasties. Wash, rinse and use them.)

Pour in the cooled water – 2 litres – mixed with the citric acid. Squash the flowerhead so that they are covered in liquid. Cover and leave in a cool dark place for about 24 hours.

After a day strain your liquid into a pot through a muslin cloth or a fine sieve. You should always have two litres of liquid so measure and add cooled boiled water if necessary. Some say that not squeezing the mixture when straining prevents clouding of the cordial later and there might be some truth in it. If you can’t resist squeezing it just go for it 🙂

Straining

Creative ways of straining!

In another big enough pot, place 1 litre of water and all the sugar. The rule of thumb seems to be 1kg of sugar per 1l of water. I, however, think that’s too much and used only 2.5kg for my final 3 litres of liquid. It’s still a lot of sugar! You have to remember though that sugar is also a conservant so if you are making your cordial to keep (it lasts up to a year), it helps to keep  it from spoiling. There are some alternatives if you don’t want yours want to be too sweet – you can swap it for brown (muscovado) sugar or stevia and as for preserving, you can increase the citric acid a bit – don’t forget that this will make it more sour as well. Warm up the sugar and water mixture on a medium heat to get a sticky syrupy liquid.

Add the elderflower water and bring to the boil. You can just bring it to the boil and turn off or boil it for up to 30 minutes to make sure it lasts, it’s up to you. I chose the former…we’ll see what happens!

Leave it rest for about 5 minutes. Pour, still hot, into prepared sterilised bottles or jars. Turn upside down to seal properly and let cool. I wrapped them in tea towels for slower cooling and left them like that overnight. Once cool, store the bottles in a dark place for up to a year.

Bottles upside down

Cooling upside down…

The best part is using this cordial up – let your imagination run free. Mix with still water, sparkling water, prosecco, gin, pour into your tea or on top of your porridge. My personal favourite is a shot of the cordial and ½ cup of white wine topped with sparkling water. Summer feeling in an instant.

Elderflower cordial

Final yield – about 4l of cordial

If you don’t like elderflower or can’t get any where you live, perhaps another herbal concoction might be of interest. If you like mint and happen to grow some in your garden or windowsill, you know how rapidly it multiplies. If you’ve had enough of mojitos, mint sauce or mint frozen in ice cubes, you could try a mint cordial.

Mint cordial

The preparation of this is very similar to the elderflower cordial. You will need:

Ingredients
2 big fistsfuls of mint (about 20 biggish stalks)
2 lemons
2 l water
1kg sugar (or 500g and some stevia to taste)
15g citric acid

Boil 2 litres of water and leave to cool. Prepare your bottles (as above).

Wash the mint stalks and leaves and roughly chop them. This will help releasing the essential oils from the leaves. Don’t waste anything, use up the stalks as well!

Slice the lemons and place them with the chopped mint in a pot. Pour over the cooled water, stir and leave to rest for about 24-48 hours. You can stir it once or twice while waiting.

Strain the mixture into a biggish pot through a muslin cloth or a fine sieve. Slowly heat up adding the sugar and citric acid. Warm up to 70-75℃ to retain aromatic materials and stir until all the sugar has dissolved.

Mint cordial prep

Mint cordial preparations…

Pour into prepared bottles, turn upside down and let cool. Store in a cool dark place afterwards. Once open, store in the fridge.

Use as you wish – mixed with water, in cocktails, in tea, poured over a fruit bowl or just like that, a bold glug from a bottle 🙂

Mint cordial

Pink mint cordial 🙂

Finally, if you don’t want to mess around with pots and pans, sieves and spoons but still want something more than just a plain water, here are 5 tips for sprucing up your aul jug…

  1. Cucumber – orange – ginger :: Put a few slices of cucumber, orange and a piece of peeled ginger in a jug of water. Leave in the fridge for a few hours to mix. Drink. If the day gets too much, add a shot of Pims!
  2. Strawberry – basil :: Add a few freshly sliced strawberries and ½ cup of basil leaves to a jug of water. Drink straight away. Instant summer hit.
  3. Apple – cinnamon :: A few slices of a sour apple and a cinnamon stick. Leave to infuse in the fridge for a few hours. Unusual combination of soothing and refreshing.
  4. Lemon – ginger :: Slice half a lemon and place into a jug with a thumb-sized peeled piece of ginger sliced thinly. A cold version of this power drink.
  5. Lavender – lemon ::  Slice half a lemon and add to ½ cup dried lavender (or fresh if you have it) into a jug. Let it infuse and drink in the afternoon to relax. Good sleep guaranteed.

Have fun and mess around with more flavours if you want: cucumber & rosemary, pear, cranberry & mandarin, melon & mint – the sky’s the limit!

Ups and downs

Switching to a simpler life came with one added bonus – I can engage my creative skills in making things myself. Being made from simple ingredients, they are better for me – and I get the satisfaction of making something with my own paws.

However, as with everything, there are successes and failures. I want to share my experience with homemade potions to encourage you to try something new (and not be discouraged if something doesn’t work)!!

Laundry

As mentioned in my last post, a homemade laundry gel is not only very easy to make but also much cheaper in comparison to store-bought products. I gave it a chance after an experiment with soap nuts which did not work for me at all. I bought a kilo of them when I started looking for an alternative to conventional laundry products. I closely followed the instructions on the nice textile bag. All was well until after a full 40 degree cycle, the clothes came out just simply wet. No feel or smell of cleanliness or freshness. I also probably didn’t fasten the little bag with the nuts properly so they ended up spread all over the wash. I was not impressed! Quickly after this, I decided to look elsewhere. In true zero waste fashion, I thought I would use the nuts for some second-degree laundry (rugs, mats, etc.) but never actually came around to do that. So, if anyone wants to give them a chance, I will happily send them my bag for free!! Maybe you can have better results than me. (Conclusion: Laundry gel – YES, soap nuts – NO)

20160614_203707

Soap nuts vs laundry gel…


Kitchen

20160614_203408

Buying in bulk 🙂

As we have a dishwasher, I searched for a recipe for homemade dishwasher tablets. After some internet research and entering the world of opinions on Borax I, luckily, found a recipe that consisted of washing soda (soda crystals), baking soda, salt and citric acid. Simple enough ingredients and simple enough instructions. Basically, mix it all together. Well…. The first batch was great. Consistency was fine, cleaning power decent as well. So I went ahead and bought a bulk pack (a 5kg tub) of citric acid. Hmm. Perhaps a slightly rushed decision. Every batch after the first one just didn’t cut it. The mixture either turned to liquid (this apparently happens in humid conditions – Ireland, duh!), turned to stone (citric acid reacting with the sodas apparently) or didn’t really wash the dishes properly (when the citric acid was added right before the wash). So, after a few trials and errors, I reluctantly went back to shop-bought tablets. I chose the Ecover brand which is supposed to be not damaging to the environment but every tablet is still wrapped in plastic. Not ideal. However, I haven’t given up on this one yet. Especially when looking at that full citric acid tub 🙂 I will try again. Perhaps the drier summer climate will help the result. (Conclusion: Dishwasher tables – MAYBE)

One more nature-friendly swap for your dishes is to change the shop-bought rinse for vinegar. I tried out red wine, white wine, malt and apple cider vinegars. They all worked perfectly and are all cheaper than the original rinse. (Conclusion: Vinegar rinse – YES)

Personal hygiene

I am not a big fan of mouthwash but here and there I like to use it. I don’t like, however, the alcohol-laden Listerine and similar products, so I searched for a natural one. The internet proved to be full of ideas and recipes which were pretty easy with simple and easily found ingredients. I followed the recipe from DIY Natural. Water, baking soda, a few drops of essential oil and you’re done. You can add some xylitol if you don’t like the salty taste of baking soda 🙂 [Recipe I use: Mix together 1/2 cup filtered water, 2 tsp baking soda, 1 tsp xylitol, 2 drops of tea tree oil, 4 drops of peppermint oil]. You might need to mix the concoction more often than you buy a bottle of Listerine (big batches are not really wanted as the oils blend and the mouthwash changes taste slightly) but it literally takes 2 minutes and I am fine with that. (Conclusion: Mouthwash – YES)

20160614_204222

Some time back, I came across an article on Treehugger about natural body scrubs and said to myself that I am going to try them out! I picked the last one with sea salt and oil. I used some sea salt that I bought in bulk (well, bulk-ish – a 2kg tub), olive oil from the kitchen and added some dried lavender from my garden. I mixed everything in a nice little Kilner jar and put it in the bathroom. But, boy oh boy, what a mess trying to use it! Maybe I am just fussy but it just didn’t work for me. The oil was everywhere and most of it was soaked in my towel rather than by my body. Not to mention the bathtub was all oily and slippery after use. I suppose if you use very hot water for your shower (which I don’t), it wouldn’t be as bad. Either way, I was happy when I finally finished the jar. I still like a good scrub though so might try the dry one – no added oil – less mess guaranteed. (Conclusion: Oil scrub – NO).

At the local market, a girl was selling homemade cosmetic products and I was curious to try her natural clay toothpaste. I tried it twice. The second time just to reassure myself that this is not for me. I am not sure if it was the weird texture or the extra salty taste. Simply put, it was just yuck. But then again, that’s just me – my friend used it and loved it!! I happily traded her Waleda toothpaste for my clay one. Until I find something else acceptable to brush my teeth with (pure baking soda sounds like a very unlikely candidate for me), I will keep using the Kingfisher natural toothpaste. Smooth and refreshing. I like. (Conclusion: Clay toothpaste – NO)

Cleaning

If you haven’t tried it yet, the internet-praised cleaning power of baking soda and vinegar is, in fact, true. I was a bit sceptical at the beginning as it did seem a bit odd just to scrub the bathroom with some white powder and spray what is basically a sour water but it does work. The child in me also loves the fizzing when you mix those two together 🙂 There are dozens of uses for this combo but I mostly use them to get the bathroom to a spotless condition. Including that pesky black mould that is an organic part of an (c)old house in a humid country. (Conclusion: soda and vinegar – YES)

There are many more but these are just a few examples of fun stuff you can try to make yourself ! Homemade soaps, lotions, shampoos…all you need is an open mind and maybe a bit of patience 🙂


Green Whites

One of the things that I like about Zero Waste is the fact that I save money. Money that can be spent on going out, meeting with friends, trying out new fun stuff. So when I learned I can replace the commercial laundry detergent with something simple for a fraction of the price, I was sold on it pretty quickly.

All I needed to swap all the chemicals usually found in laundry products for something greener were two things – a bar soap and washing soda – and a bit of time to mix them together. I found this laundry detergent recipe in the Bea Johnson’s book and adapted it a bit.

You might be sceptical if this easy solution works but I’ve been using it now for a couple of months and I am very happy with the results!

What you need

Bar of soap – recipes in cyberspace ask for all kinds of different soaps but your basic castile soap bar, laundry soap or any natural soap bar will do. Bea recommends using the blue one which contains optical brighteners. I bought mine in Slovakia last time I visited but I am sure you can find it anywhere 🙂 Dr. Bronner makes soap bars that should be fit for the purpose!

Washing soda – or soda ash – usually sold in supermarkets in the laundry aisle. It took a little bit of internet research to find out that in Ireland I need to look for soda crystals! I found one kilogram bags being sold in Tesco – the bags are still made of plastic film which is not recyclable but at least the pack lasts some time.

20160530_191057_20160602220017493

The last ingredient is just warm water. Other than that a few utensils will come handy – a basin or a bucket for mixing, a measuring jug, a measuring cup and a mixing spoon. Depending on the method you use, you might need a hand blender to liquidise it.

How to make it

For a 3-litre (about 3 quarts) dose, you will need a ½ cup of washing soda and a ½ cup of soap. Measure up the washing soda and pour it in the basin. Grate the soap (I use a conventional cheese grater) and add to the basin. Mix them together a little.

pixlr_20160602201315825_20160602205353995

Pour in about 0.5 litres of hot water (about half a quart). I use boiled water to start the mixing. Stir until the soap and soda are mostly dissolved. Add another litre of hot water. I then pour in 1.5 litres of cold water to bring the temperature to lukewarm. Stir the mixture for a little while and leave it to settle, best overnight. In the morning, when the liquid has turned into a wobbly jelly, enjoy this chemistry magic for a while and then break it with the mixing spoon. To bring it back to liquid form (it will be nicely thick), use a hand blender for a couple of minutes. If you used an unscented soap and you would like to add some scent, you can now add a few drops of any essential (not synthetic) oil – lavender, citrus or tea tree work well.

I asked my lovely boyfriend to film this part of the preparation process – please be kind with your comments 🙂

Pour the finished product into a prepared jug (I use a 3l plastic milk jug) and voila, your laundry gel is ready to use.

If you don’t have a hand blender or you want to skip this step, you can pour the warm mixture straight into the jug you are going to use to store the product and leave it to cool in there. Just make sure you shake it a couple of times in the next few hours to ensure all the ingredients are mixed properly. I found that with this method, the gel is more likely to separate when not used for a while but then just shake the bottle and you’re good to go.

20160531_221108

How to use it

I usually use about a cup (250ml) per load, adjusted for the amount of clothes and level of dirtiness 🙂 One 3l dose lasts me for about 13 washes. With 3 washes per week on average (darks, lights and towels for 2 people), I have enough for a month to 5 weeks. The recipe is very easily doubled or tripled if you want to make more, so no need to skimp!

I normally pour the gel into the detergent compartment in the washing machine but I don’t see why you couldn’t put it directly in the drum.

How much it costs

I mentioned in the video that this laundry gel costs about 10 times less than a conventional gel. These are my calculations:

Expenses:

300g laundry soap €1.501kg soda crystals €1.39

For 3l of the gel I need 60g of the soap (one pack lasts for 5 doses or 15 litres of gel) and about 90g of the soda (for 15 litres I use half a pack for €0.70).

In total, 15 litres of the gel costs €2.20. That is €2.20 for 65 washes (5 x 3l dose x 13 washes per dose).

A comparable conventional laundry detergent (let’s say Persil Small & Mighty Non-Bio 60 washes) costs €19.80 – which is 9x more. On offer, Ariel Bio Washing Liquid 60 washes costs €10.00 which is still 5x more than my non-toxic and totally working laundry gel.

The prices might vary where you live but I guarantee you that you can save money (not to mention all the chemicals which will not get into the waterways from the washing machine).

Final notes

My friend also uses this recipe because she and her daughter have very sensitive skin and conventional laundry products are quite irritating for them. So, that’s another brownie point for the homemade stuff.

Finally, if you’re asking about fabric softener that would be natural and eco-friendly, think  vinegar. Apple cider vinegar and white distilled vinegar work well for me.  About a ¼ – ½ cup (60 – 120 ml) with a few drops of essential oil of your choice (I like grapefruit or tea tree) will give the clothes nice smell and touch.

Well…are you tempted to give it a try yet?


Know your enemy

If you want to combat any enemy, first you have to know what you are dealing with. So when I wanted to scale down the waste our household produced, I went routing through the bins. Literally.

What I found was probably very similar to what you would in any western-world household. Most of it was packaging – for food, drinks or cosmetics. Then there were recyclable items like PET bottles, cardboard, magazines and papers, tins, glass bottles and organic waste.

Full-bins

Looks familiar?

I used to live in an apartment block where there were recycling bins but there was no option to separate organic waste. You can imagine the look (and smell) of the bins whenever they missed a collection. So I was very happy when we moved to a house where we could pick our waste collection company – and I picked one that collected food waste separately. Score!

That was even before I embarked on the Zero Waste journey so now I am pretty used to separation of green and other waste. With that sorted, there were the recyclables and the ‘general waste’ to plough through.

Soda Stream

Soda Stream & Aloe Vera King Mango

Recycling is great but refusing, reducing and reusing is still better. We try to cut down on buying stuff in general even though it comes in a recyclable packaging. One of the very first alternatives we adopted was switching from buying sparkling water in plastic bottles to the Soda Stream system. The gas cylinders are reusable and you even get a discount when you bring your old cylinder to the store. This had significantly helped reduce the recyclables because sparkling water is popular in our little household! An added bonus is that we don’t have to carry all the heavy bottles from the shop!

We also learned to love our tap water which (filtered) tastes great! This, in combination with reusable stainless steel bottles, cuts down another big batch of plastic waste! Oh and as for all the cokes, 7-ups and other sugary soft drinks full of god-knows-what, we just stop buying them. The only soft drink we buy in a PET bottle is a natural mango aloe vera juice.

Mango Fizz

“Mango Fizz”

“Mango Fizz” – the juice diluted with ⅔ of sparkling water – is my boyfriend’s beverage of choice :). You might argue that that’s also creating waste but I am trying to find a sustainable balance for our life that will work on a long-term basis and compromises are part of that!

So in this way, I went through all the recyclables and consciously divided them into two simple categories and courses of action: avoidable – stop buying – and non-avoidable (yet) – buy (much) less.

When I moved over to the ‘general waste’ pile, that’s where it got a bit tricky. Mostly because about 85% of it was packaging. A modern western life really seems to have an obsession in packing everything. Some of this might be necessary for transport but there is a lot of double or triple layers of ‘protective’ paper or plastic that is far from necessary. Take a simple pack of sliced ham or cheese. Not only are those 6 slices packed in a plastic box but they are separated from each other by a piece of plastic film. That’s such a waste! But sadly, it seems to be the norm.

Lettuce in a bag

Sadly, this is the norm…

The easiest thing is to buy less processed packaged food …you’d think. But here in Ireland it is quite challenging to buy even the ingredients for home cooking without layers of the wasteful packaging. Fruit and vegetables, which are perfectly fine in their own peels and outer layers of leaves, are often thrown into a plastic bag – just so that it’s easier to stick the label with a barcode on them.

It also depends where I want to buy my food. Farmers’ markets are great altogether but if there are none at a convenient distance from where I live or work, I will hardly visit them regularly. Burn the petrol in a car just to get some fruit and veg does not add up for me. There is one market nearby but it only opens one day for two hours. I went there a few times but it’s more of a baked-goods-and-preserves type of market – things I like making myself so don’t want to buy them. But I made a resolution to visit more often – especially during the summer when there will be, hopefully, more fresh produce to be bought. 

I really want to support my local small fruit & veg shop but they pack everything – 6 apples on a polystyrene tray wrapped in cling film and sold to you in a plastic bag. I had a chat with them about selling loose produce but it hasn’t stuck for now. If I am really in need, I buy a pack of apples in there, don’t take the plastic bag and bring the polystyrene tray back. Then the only waste is the bit of cling film. As I said, compromises.

There are no bulk bin sections in the supermarkets here or dedicated bulk stores like in other European cities and America. Shopping for things with no packaging (or with the least packaging possible) can be challenging…and it does take a bit of planning to not make shopping a chore. But it’s totally worth it.

Next week, I tell you more about my other shopping solutions!